CertainTeed is one of the most trusted names in asphalt roofing, but even premium shingles can fail if they’re nailed wrong, laid out of sequence, or installed without following the manufacturer’s specs. That’s exactly why having a proper CertainTeed shingles installation guide matters, it’s the difference between a roof that lasts 30 years and one that starts curling after five. Whether you’re a homeowner vetting your contractor’s work or a professional brushing up on best practices, knowing what "by the book" actually means gives you real leverage over the outcome.
At Sunflowers Energy LLC, we install CertainTeed shingle systems on residential roofs across our service area, and we follow manufacturer specifications to the letter, because that’s what keeps warranties intact and roofs performing. We put this guide together based on those same standards, breaking down the key steps, material requirements, and common mistakes to watch for. Below, you’ll find a step-by-step walkthrough covering everything from deck preparation to ridge cap installation, so you know exactly what a proper CertainTeed shingle job looks like from start to finish.
Before you start: match the shingle system
CertainTeed makes several distinct residential shingle product lines, and each one has specific nailing patterns, exposure widths, and accessory requirements that differ from the next. Before you order materials or pick up a nail gun, you need to know exactly which shingle system you’re working with. Using this CertainTeed shingles installation guide the right way starts here, because treating a Grand Manor the same as a standard Landmark shingle will void your warranty and compromise the roof’s performance.
Identify your CertainTeed shingle line
CertainTeed’s residential lineup spans several tiers, and each tier installs differently. The table below covers the most common lines and their key installation variables:
| Shingle Line | Type | Exposure | Min Slope |
|---|---|---|---|
| Landmark | Laminated architectural | 5-5/8" | 2:12 (modified) |
| Landmark Pro | Enhanced laminated | 5-5/8" | 2:12 (modified) |
| Grand Manor | Premium laminated | 6" | 4:12 |
| Presidential Shake | Multi-layer premium | 10" | 5:12 |
Getting the exposure measurement wrong by even a quarter inch across a full roof will throw off your entire layout and create alignment problems visible from the street.
Confirm your warranty path before buying accessories
CertainTeed’s SureStart Plus warranty requires a complete system of approved accessories: the correct underlayment, CertainTeed-approved starter strips, and specific hip and ridge products matched to your shingle line. Mixing in off-brand components is one of the fastest ways to lose warranty coverage before the first shingle goes down. Pull the product-specific installation instructions directly from CertainTeed’s website and confirm which accessories your shingle line requires before you purchase anything.
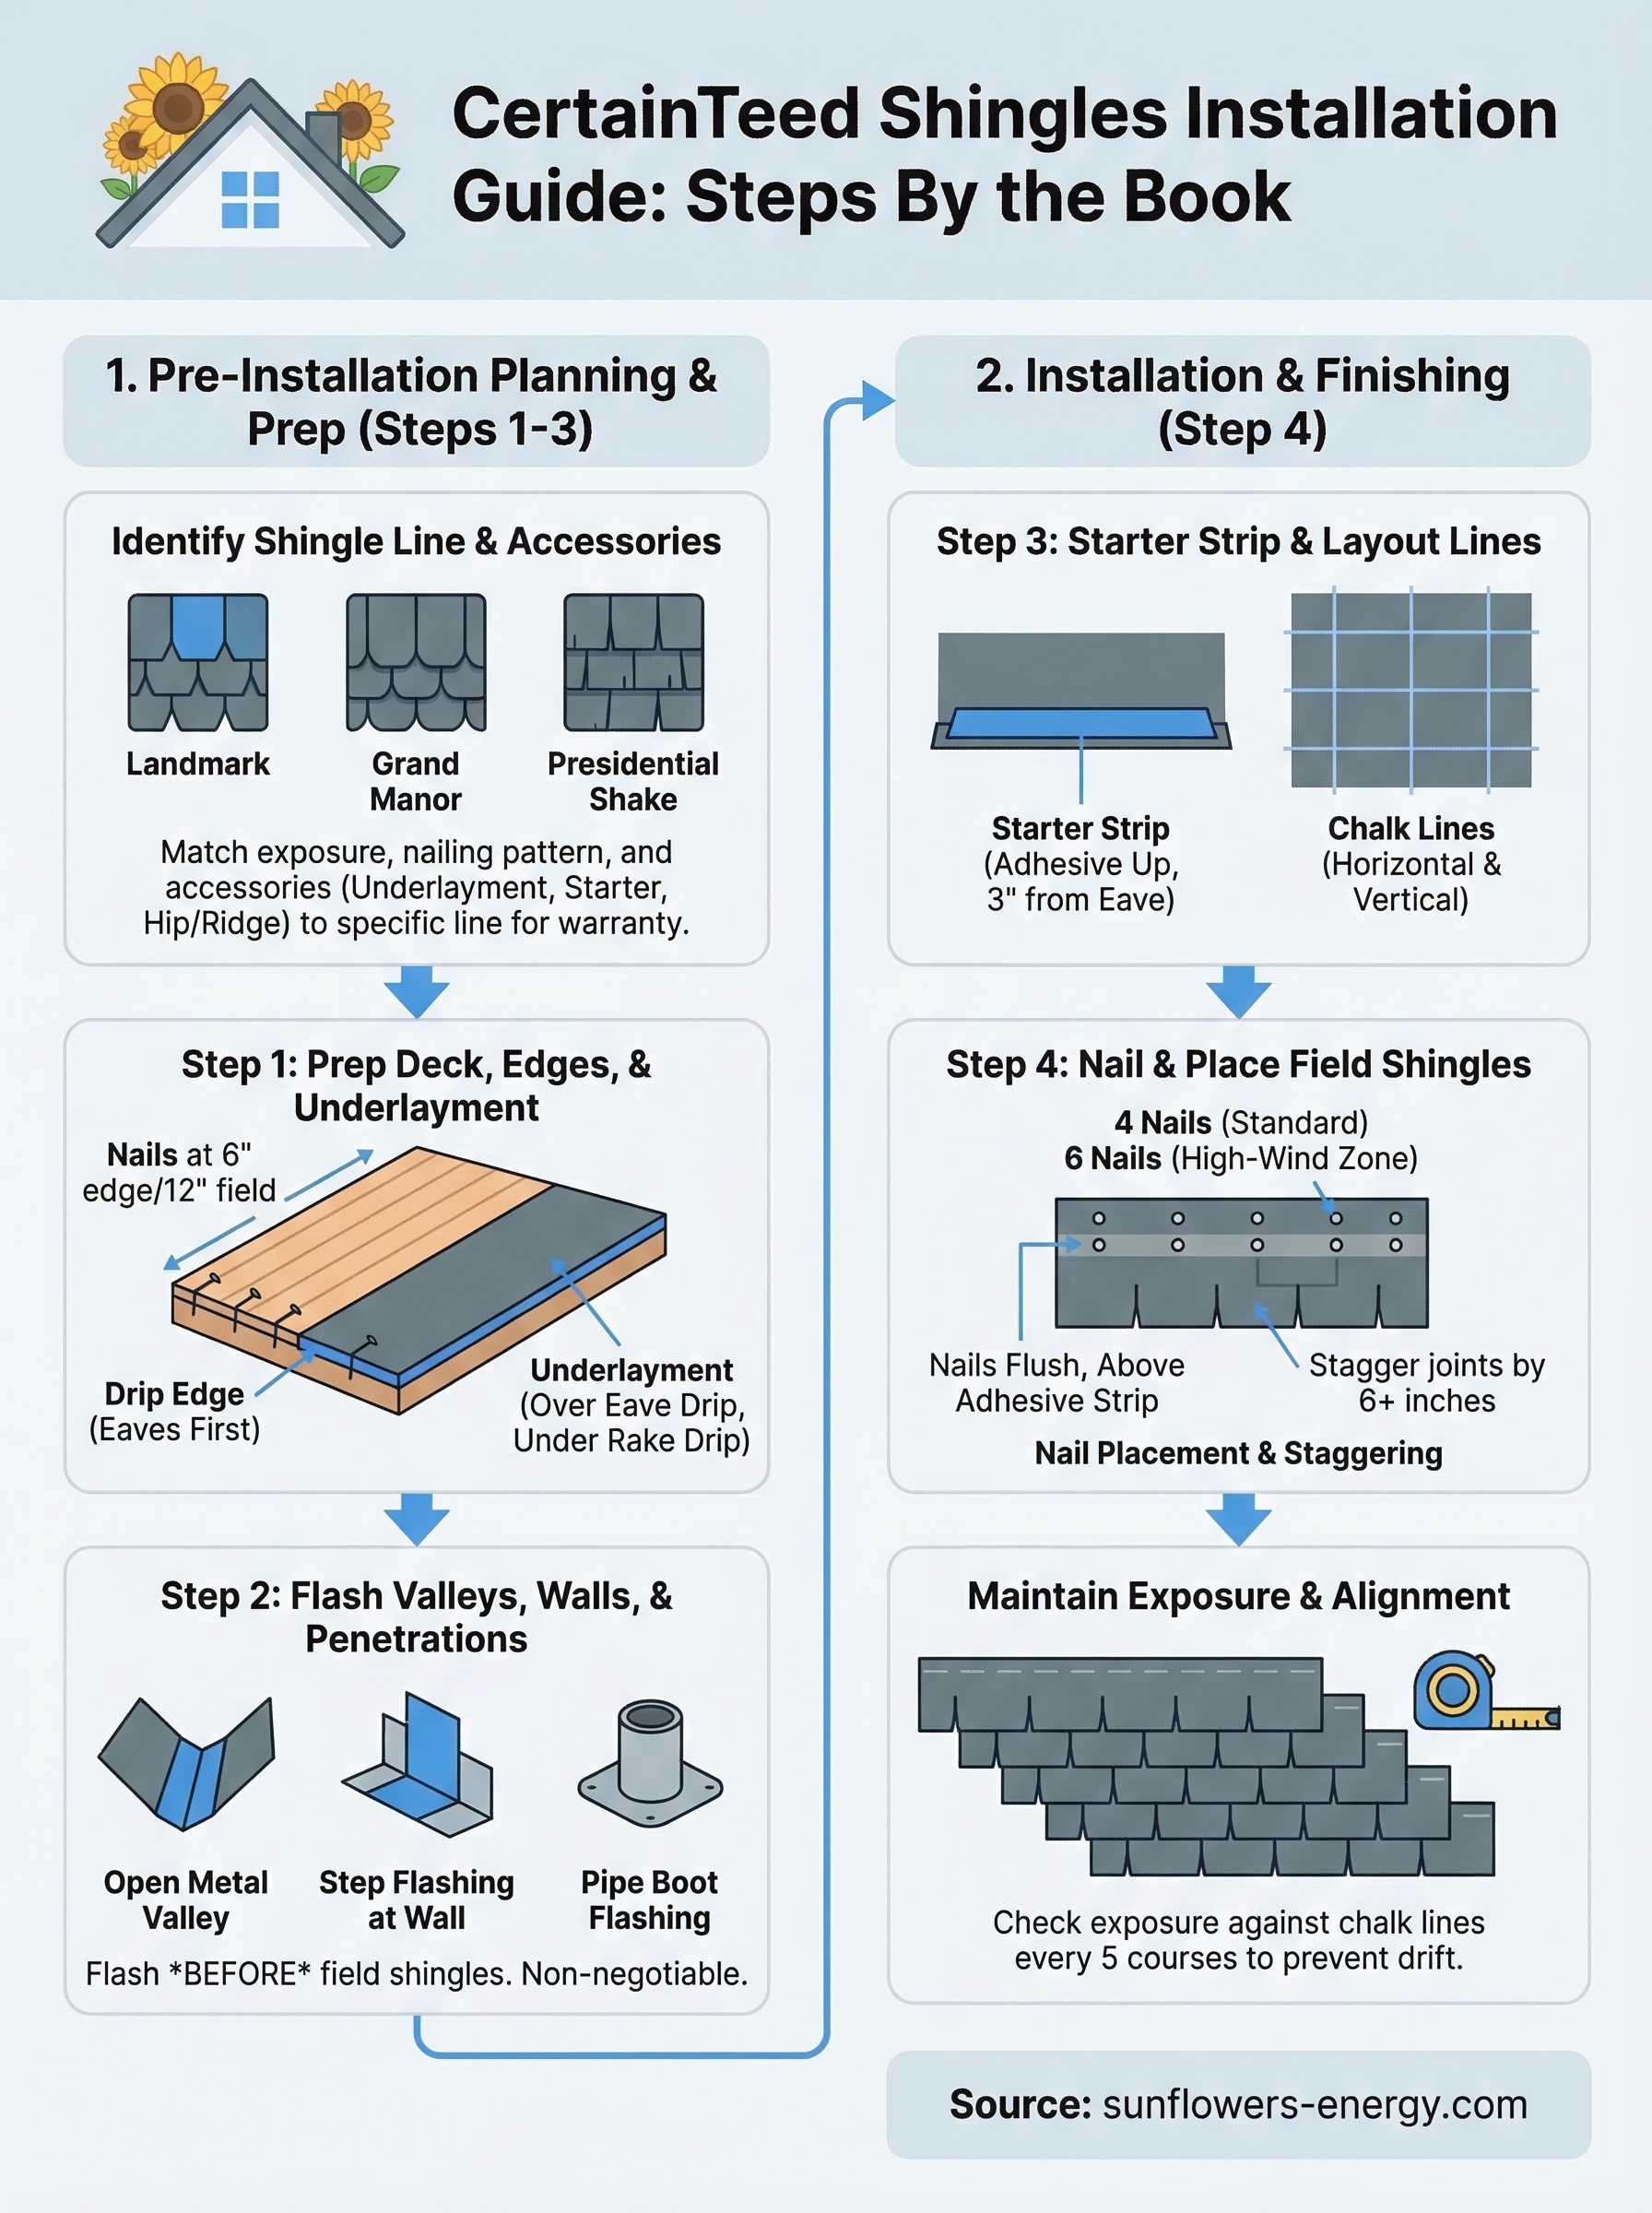
Step 1. Prep the roof deck, edges, and underlayment
Before any shingle touches your roof, the substrate needs to be solid, clean, and properly staged. CertainTeed requires a minimum 3/4-inch thick plywood or OSB deck with no more than a 1/8-inch gap between panels. Walk the deck and check for soft spots, rot, or missing fasteners, and replace any compromised sheathing before moving forward.
Inspect and secure the deck
Your deck panels need to be fastened every 6 inches along edges and 12 inches in the field. If panels shift or flex under foot traffic, add fasteners before proceeding. Here’s a quick pre-installation deck checklist:
- No panel gaps wider than 1/8 inch
- No soft spots, rot, or delamination
- All panels properly nailed at edges and field
- Deck surface clean and free of debris
Install drip edge and underlayment in the right order
Drip edge goes on the eaves first, then underlayment lays over it. On rakes, the sequence flips: underlayment goes down first, then drip edge lays over the top. This step trips up a lot of installers, and it’s addressed directly in this CertainTeed shingles installation guide because getting it backwards causes water to wick behind the drip edge at the rake edges.
On low slopes between 2:12 and 4:12, CertainTeed requires a double layer of underlayment with a 19-inch overlap starting at the eave.
Step 2. Flash valleys, walls, and roof penetrations
Flashing is where most installation failures start on an otherwise solid roof, and this CertainTeed shingles installation guide treats it as a non-negotiable step. CertainTeed’s specs require all valleys, walls, and roof penetrations to be flashed before the first field shingle goes down. Skipping this work puts your entire shingle system at risk, no matter how carefully you nail the shingles.
Valley flashing methods
CertainTeed recognizes two main approaches: open metal valleys and woven or cut valleys. For open valleys, install at least 24-inch wide roll valley flashing centered in the valley, lapping a minimum of 6 inches at joints and sealing with roofing cement. For woven valleys, run shingles from both sides in alternating courses and keep nails at least 6 inches away from the valley centerline.
Never nail through the metal in an open valley; use roofing cement to hold the shingle edges against the valley flanges instead.
Walls and penetrations
At vertical walls, install step flashing with each individual shingle course rather than running one continuous piece. For roof penetrations, match the flashing material to the penetration type:
- Pipe vents: lead or rubber boot seated in roofing cement
- Skylights: pre-made curb flashing with counterflashing at the top
- Chimneys: step flashing on sides, saddle flashing at the back
Step 3. Install starter strip and snap layout lines
The starter strip sets the foundation for every shingle course above it, and your layout lines determine whether the finished roof tracks straight from the ground up. This step in the CertainTeed shingles installation guide is where precision pays off before a single field shingle goes down.
Fasten the starter strip correctly
CertainTeed recommends their WinterGuard or Landmark starter product along the eave edge, positioned so the adhesive strip faces up and sits 1/4 inch back from the drip edge. Nail it 3 inches from the eave, spaced every 12 inches across the full length.
Follow these fastening rules for a clean starter course:
- Trim the first piece 3 to 6 inches at the rake to offset field shingle joints
- Keep all nails at least 3 inches from the eave edge
- Never align starter strip seams directly with field shingle joints
Snap chalk lines for straight courses
Your layout lines are the single most important factor in keeping courses parallel across the entire roof plane.
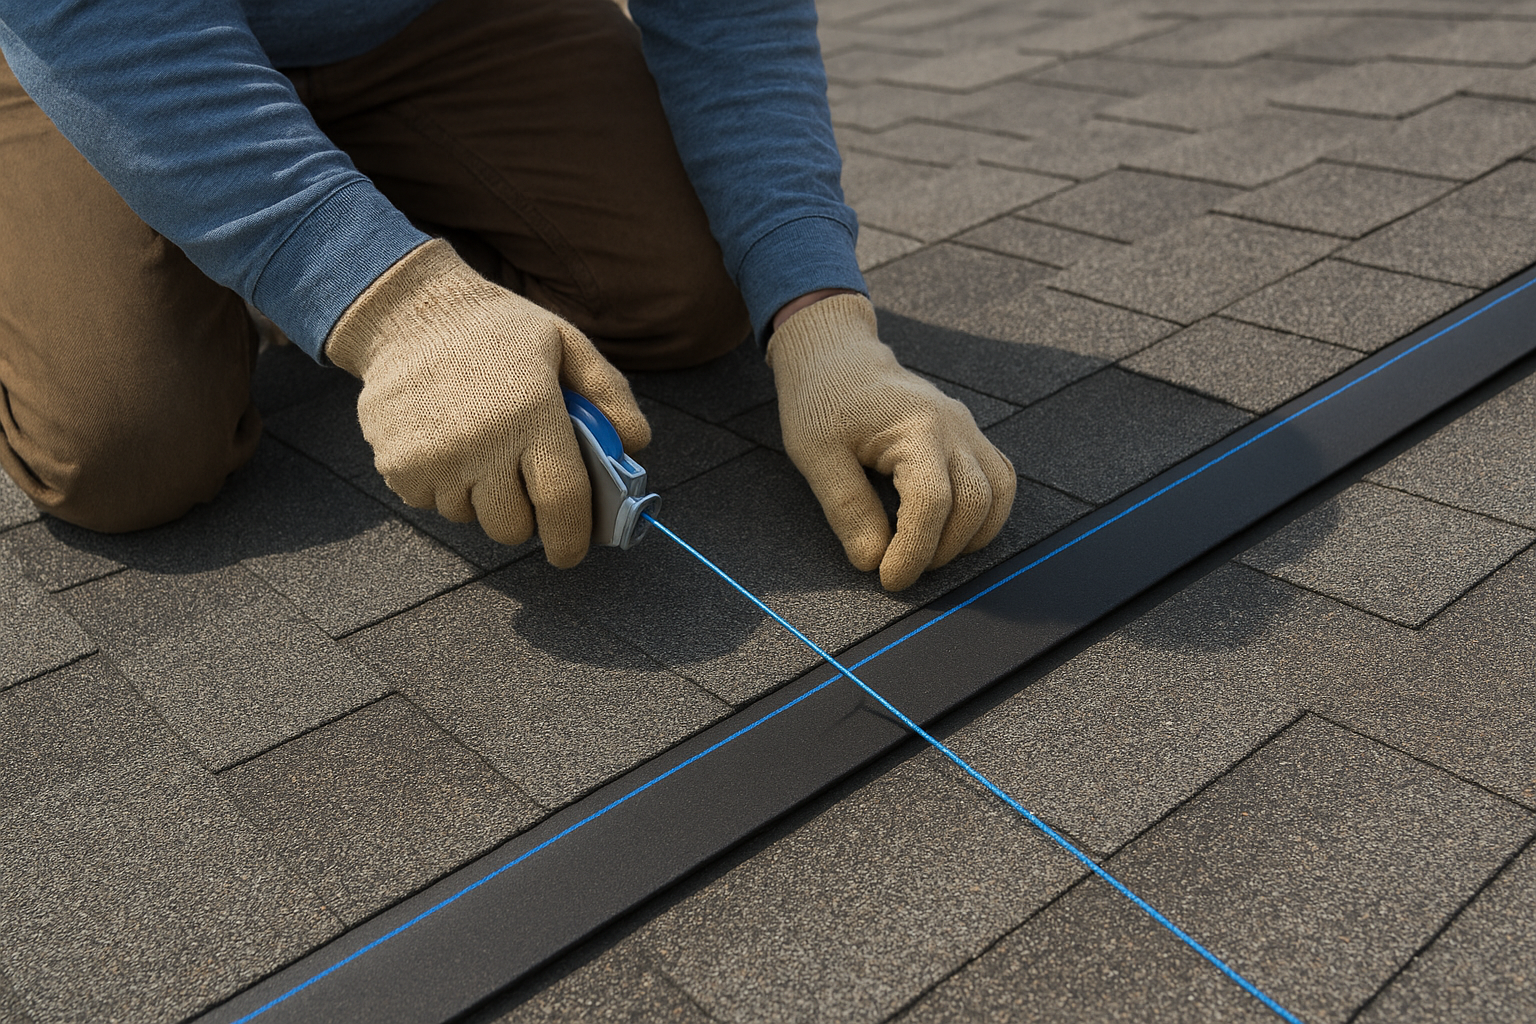
Use a chalk line to mark horizontal lines every two courses up the roof, referenced against your shingle’s specific exposure measurement. Also snap vertical lines every 4 feet across the field to maintain column alignment. This two-axis grid catches drift before it compounds across dozens of courses.
Step 4. Nail and place field shingles the CertainTeed way
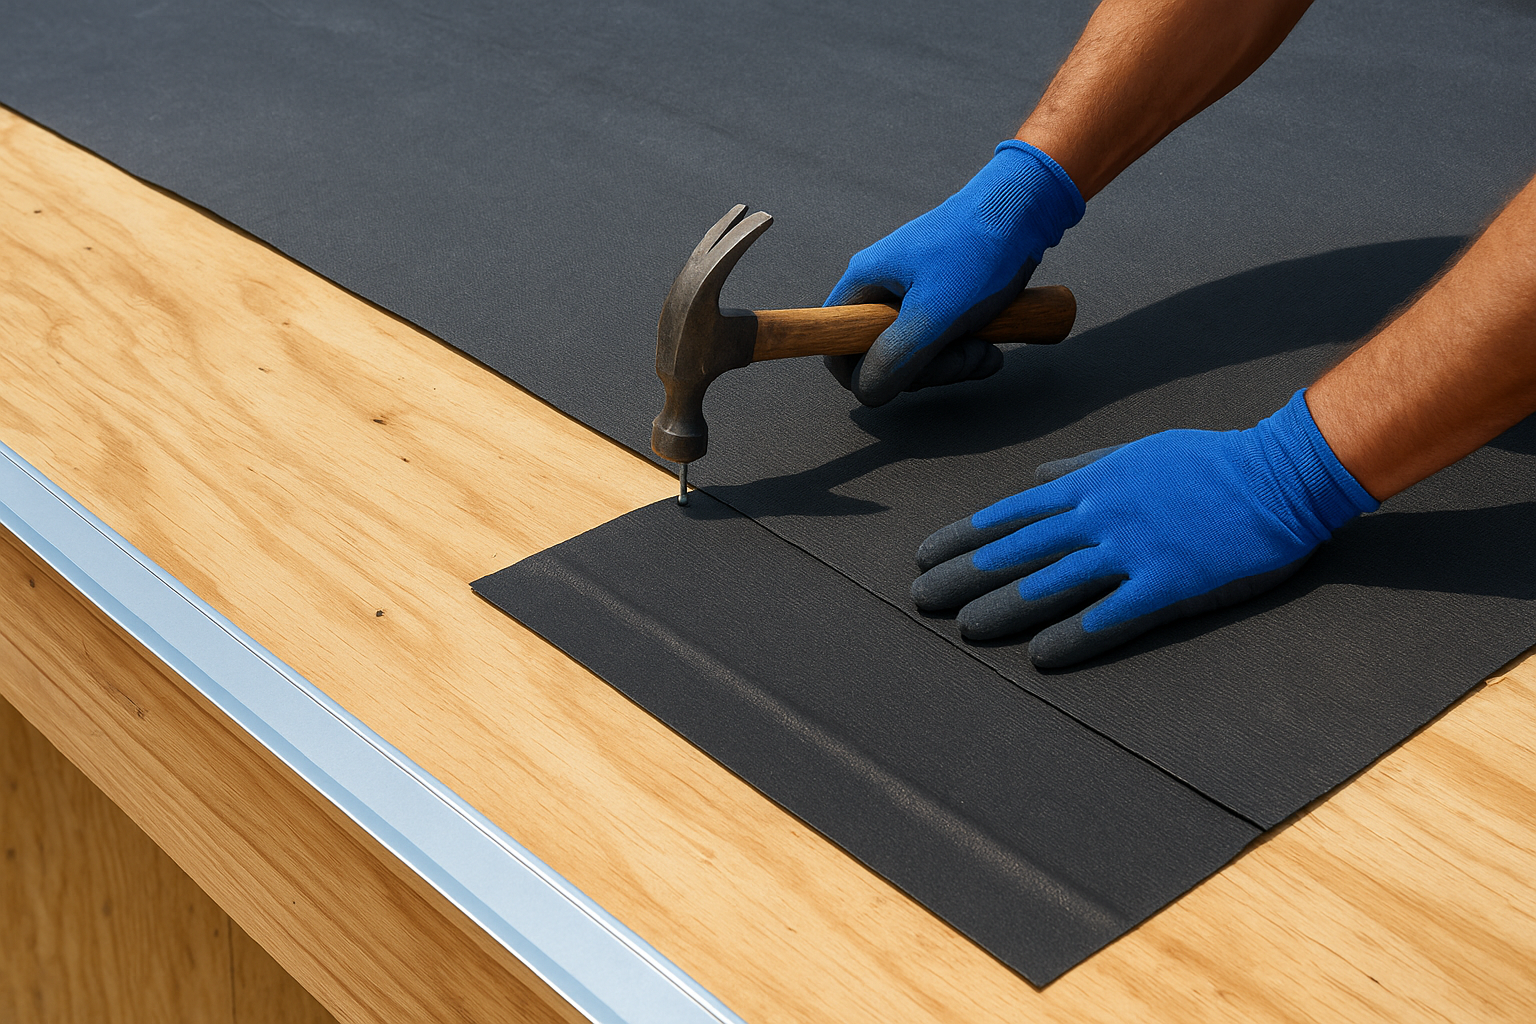
Field shingle placement is where this CertainTeed shingles installation guide comes down to pure execution. CertainTeed requires 4 nails per standard Landmark shingle, positioned 1 inch from each end and evenly spaced just above the adhesive strip. Drive every nail flush with the surface, not countersunk, not raised.
Nail placement and fastener specs
Your nail gun pressure matters as much as nail position. Use 11 or 12-gauge roofing nails with a 3/8-inch minimum head diameter, and set your compressor so each nail seats flush without breaking through the fiberglass mat. In high-wind zones rated at 110 mph or above, CertainTeed requires 6 nails per shingle, so confirm your local wind rating before you start.
| Specification | Standard | High-Wind Zone |
|---|---|---|
| Nails per shingle | 4 | 6 |
| Nail gauge | 11 or 12 | 11 or 12 |
| Head diameter | 3/8 inch min | 3/8 inch min |
| Length (new deck) | 1-1/4 inch | 1-1/4 inch |
Stagger joints and maintain course exposure
A misaligned joint pattern that repeats across courses creates visible vertical lines from the street and concentrates water runoff in the same spot on every course.
Offset each course’s end joints by at least 6 inches from the course below. Check your exposure against your chalk lines every 5 courses to catch any drift before it multiplies across the full roof plane.
Next Steps
Following this CertainTeed shingles installation guide gets you through the technical requirements, but execution is where it counts. You now have the core steps: deck prep, flashing, starter strip, layout lines, and field shingle placement with the correct nail pattern and exposure. Each step builds on the last, and skipping or rushing any one of them puts the whole system at risk.
Even with a solid guide in hand, working with a certified installer protects your warranty and your investment. CertainTeed’s SureStart Plus warranty requires credentialed installation, meaning the person doing the work needs to meet CertainTeed’s standards. If you want full warranty coverage and a roof built to last, that piece matters as much as any step in this guide.
At Sunflowers Energy LLC, we install CertainTeed shingle systems to manufacturer spec on every job. Get a free roofing inspection and estimate and we’ll walk you through exactly what your roof needs.
