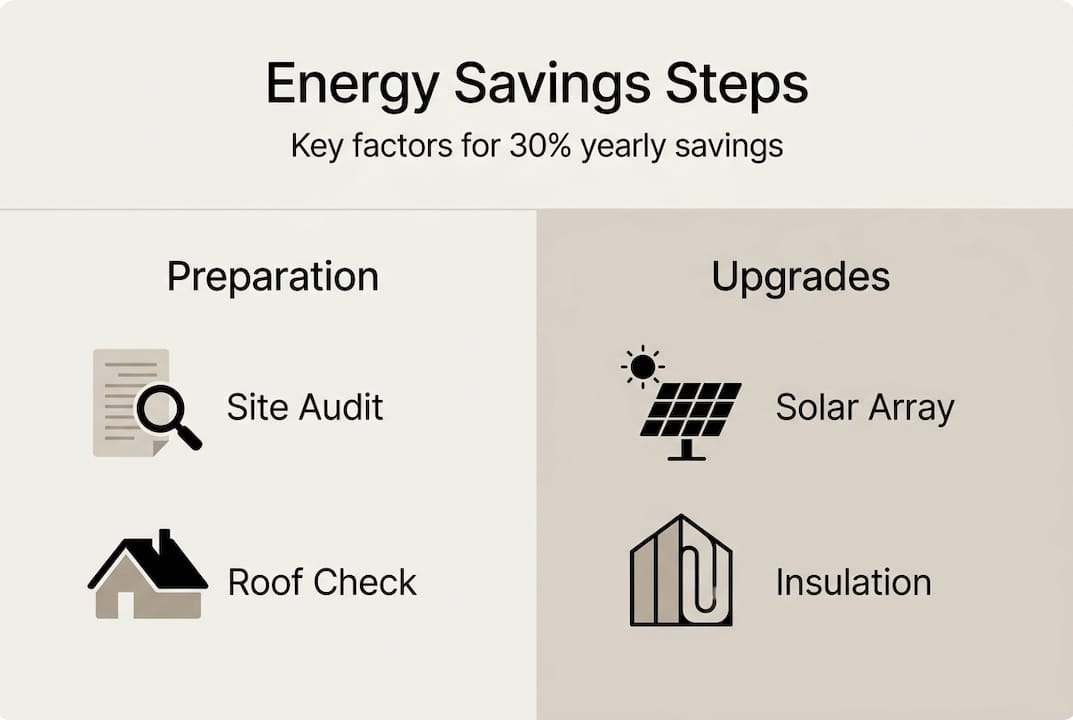
Energy savings optimization: complete guide saves 30% yearly
High energy bills drain your budget every month while inefficient systems waste power and harm the environment. Many homeowners and businesses struggle with outdated roofing and lack of renewable energy solutions, leading to unnecessary costs and reduced sustainability. A structured energy savings optimization process combining solar energy and strategic roofing improvements can slash expenses by up to 30% annually while boosting property value. This comprehensive guide walks you through each critical step, from initial site assessment through installation and ongoing maintenance, ensuring you maximize returns on investment and achieve lasting energy independence.
Table of Contents
- Key takeaways
- Preparing for energy savings optimization: site assessment and planning
- Executing the optimization process: solar system design and roofing integration
- Verifying and maintaining optimized energy savings: performance monitoring and troubleshooting
- Optimize your energy savings with expert roofing and solar solutions
- FAQ
Key Takeaways
| Point | Details |
|---|---|
| Data driven sizing | Collect 12 months of utility bills to accurately size the solar system and prevent oversizing or undersizing. |
| Shading analysis | Evaluate shading at different times and seasons to optimize placement and avoid output losses. |
| Roof and solar bundling | Coordinate roof upgrades with solar installation to reduce costs and ensure the roof supports the system for its lifespan. |
| Digital planning and MLPE | Use digital modeling tools and MLPE technology to improve placement accuracy and energy production estimates before installation. |
Preparing for energy savings optimization: site assessment and planning
Successful energy optimization starts with thorough preparation and data collection. Begin by gathering 12 months of utility bills to identify consumption patterns, peak usage times, and seasonal variations. This baseline data reveals how much energy you actually need and helps size your solar system appropriately. Understanding your current energy profile prevents oversizing or undersizing equipment, both of which waste money.
Roof condition assessment comes next and proves absolutely critical. Evaluate your roof’s age, material type, structural integrity, and any existing damage before considering solar installation. Installing panels on a roof nearing the end of its lifespan creates expensive complications later when you must remove arrays for repairs or replacement. A comprehensive site assessment examining energy bills, roof integrity, and shading factors establishes the foundation for optimal system design.
Shading analysis requires careful attention because even partial shade dramatically reduces solar output. Walk your property at different times of day noting shadows cast by trees, chimneys, neighboring buildings, or other obstructions. Seasonal changes affect shading patterns, so consider how deciduous trees will impact winter versus summer performance. Professional assessors use specialized tools to measure and model shading throughout the year.
Digital modeling tools revolutionize the planning process by creating precise 3D representations of your roof. These platforms capture roof pitch, orientation, dimensions, and obstacles to generate accurate installation plans. The technology identifies optimal panel placement zones and calculates expected energy production before any physical work begins. This eliminates guesswork and prevents costly mistakes during installation.
Bundling roof upgrades with solar installation from the outset delivers substantial financial advantages. If your roof needs replacement within the next decade, coordinate both projects simultaneously. This approach reduces labor costs, minimizes disruption, and ensures your roof will support panels for their entire 25 to 30 year lifespan. Many contractors offer package pricing that makes combined projects more affordable than tackling them separately.
Pro Tip: Schedule a free roof inspection early in your planning process to identify hidden structural issues, water damage, or deteriorating materials that could delay solar installation or require unexpected repairs.
The preparation phase also involves researching local regulations, permits, and utility interconnection requirements. Building codes vary by jurisdiction and may dictate specific installation standards, setback distances, or fire safety measures. Understanding these requirements upfront prevents project delays and ensures compliance. Contact your utility company to learn about net metering policies, interconnection procedures, and any application fees that apply to your situation.
Financial planning completes the preparation stage. Research available incentives including federal tax credits, state rebates, local utility programs, and financing options. Calculate projected savings based on your consumption data and estimated system output. Compare different payment methods such as cash purchase, solar loans, or power purchase agreements to determine which aligns with your financial goals. Detailed preparation transforms a complex project into a manageable solar installation process with predictable outcomes.
Executing the optimization process: solar system design and roofing integration
With preparation complete, execution begins with precise solar array design using professional modeling software. Digital platforms like PVcase or PVsyst create detailed layouts showing exact panel placement, wiring routes, and equipment locations. These tools simulate system performance under various conditions, allowing designers to test different configurations before committing to one approach. The software accounts for roof geometry, local weather patterns, and shading to predict annual energy production accurately.
Optimizing panel tilt and orientation maximizes sunlight capture throughout the year. In the northern hemisphere, south facing arrays typically generate the most energy, though east or west orientations can work depending on your consumption patterns and roof layout. Tilt angle should approximate your latitude for year round efficiency, but installers may adjust this based on seasonal priorities or structural constraints. The optimal panel layout considering tilt, orientation, and module type directly impacts long term energy production and financial returns.
Selecting appropriate components requires balancing performance, cost, and reliability. Choose solar panels based on efficiency ratings, warranty terms, temperature coefficients, and manufacturer reputation. Higher efficiency modules cost more but generate more power per square foot, making them valuable for space constrained roofs. Inverter selection proves equally important because this equipment converts DC power from panels into usable AC electricity. String inverters work well for unshaded roofs, while microinverters or power optimizers excel in partially shaded conditions.
Electrical design encompasses inverter sizing, wiring configuration, and safety equipment. Undersized inverters cause efficiency losses by limiting power output during peak production periods, while oversized units waste money without performance benefits. Proper inverter sizing typically ranges from 1.1 to 1.25 times the array’s DC rating, accounting for real world conditions and electrical losses. Wiring must handle maximum current safely with minimal voltage drop, requiring appropriate gauge conductors and secure connections throughout the system.
Module Level Power Electronics (MLPE) technology deserves special consideration for installations facing shading challenges. Traditional string inverters treat all panels as a single unit, so shade on one module reduces output across the entire string. Microinverters attached to each panel or DC optimizers paired with a central inverter allow each module to operate independently. This architecture prevents shading losses and can reduce efficiency drops by 30% compared to standard string configurations in partially shaded conditions.
Pro Tip: Choose MLPE technology like microinverters or power optimizers if your roof experiences any shade during peak sunlight hours, as the performance gains typically justify the additional investment within the first few years.
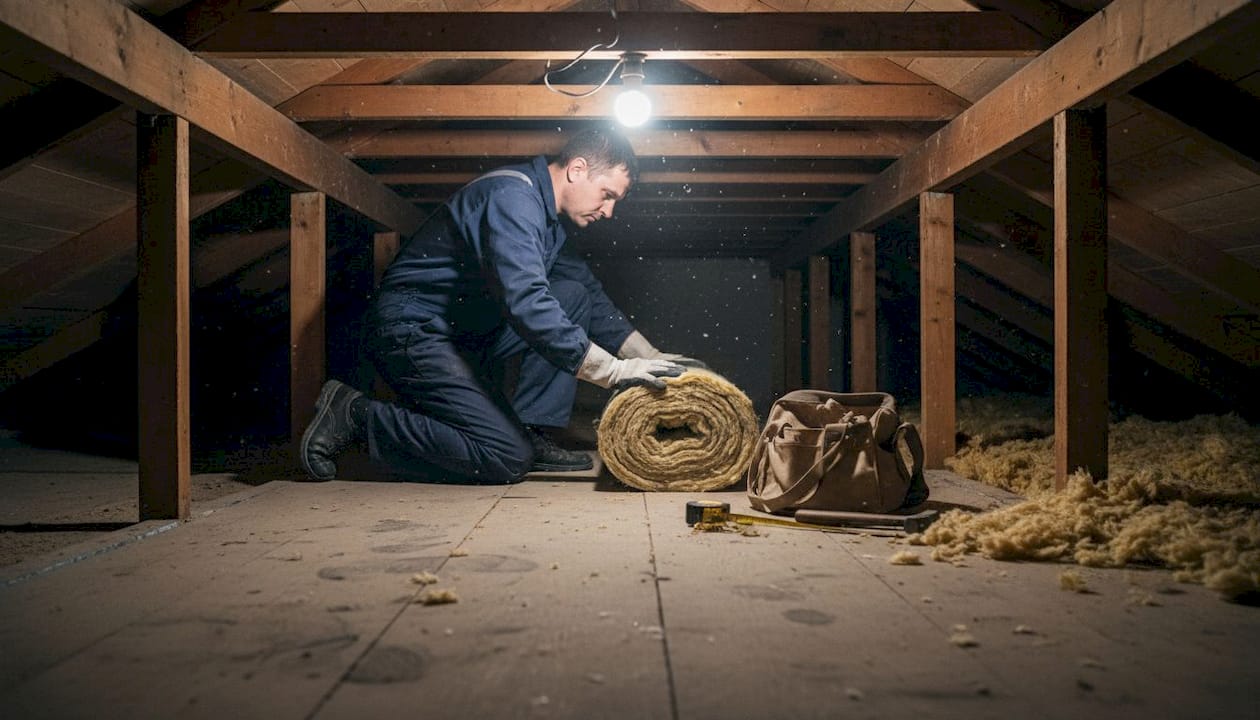
Integrating roofing upgrades amplifies overall energy savings beyond solar production alone. Enhanced attic insulation reduces heating and cooling loads, lowering the total energy your home or business requires. Proper ventilation prevents heat buildup in summer and moisture problems in winter, protecting both your roof structure and living spaces. Reflective roofing materials or cool roof coatings reduce heat absorption, decreasing air conditioning demands in warm climates. Coordinating these roofing improvements with solar installation creates a comprehensive efficiency upgrade that compounds savings year after year.
| Scenario | String Inverter Efficiency | MLPE Efficiency | Efficiency Gain |
|---|---|---|---|
| No shading | 96% | 96% | 0% |
| Light partial shade | 73% | 91% | 18% |
| Moderate shading | 62% | 88% | 26% |
| Heavy partial shade | 51% | 81% | 30% |
Installation execution follows engineered plans precisely to ensure safety and performance. Qualified installers mount racking systems securely to roof framing, seal all penetrations against water intrusion, and position panels according to design specifications. Electrical connections must meet code requirements with proper grounding, overcurrent protection, and clearly labeled disconnects. Professional installation includes commissioning tests that verify voltage, current, and power output match expected values before the system goes live.
Quality control during installation prevents future problems and maximizes system longevity. Inspect all mounting hardware for proper torque and corrosion resistance. Verify that wiring uses appropriate conduit, strain relief, and weatherproof connections. Check that panels are clean and undamaged before energizing the system. Document the installation with photos and detailed notes about equipment serial numbers, configuration settings, and any deviations from original plans. This solar energy efficiency approach ensures your system operates at peak capacity from day one.
Verifying and maintaining optimized energy savings: performance monitoring and troubleshooting
Ongoing performance monitoring ensures your optimized system delivers expected savings year after year. Modern solar installations include monitoring platforms that track energy production in real time, compare actual output to predicted values, and alert you to potential problems. Review your monitoring data weekly during the first few months to establish baseline performance patterns. Monthly checks suffice once you confirm the system operates normally, but always investigate sudden drops in production immediately.
Common causes of energy loss include debris accumulation, equipment malfunctions, and environmental factors. Leaves, dust, bird droppings, or snow covering panels block sunlight and reduce output proportionally to the shaded area. Inverter failures or communication errors prevent power conversion even when panels generate electricity. Wiring problems such as loose connections or damaged conductors create resistance that wastes energy as heat. Temperature effects reduce panel efficiency in extreme heat, though quality modules minimize this impact through superior temperature coefficients.
Shading issues may develop over time as trees grow or new structures appear near your property. Monitor for changes in shading patterns and address them proactively by trimming vegetation or adjusting panel positions if possible. Shading and undersized inverters together account for the majority of correctable efficiency losses in residential systems, but both respond well to targeted fixes once identified.
Regular maintenance preserves system performance and extends equipment lifespan. Clean panels two to four times per year depending on your environment, using water and a soft brush to remove accumulated dirt without scratching the glass. Inspect mounting hardware annually for signs of corrosion, loose bolts, or structural movement. Check inverters for error codes, unusual sounds, or excessive heat that might indicate developing problems. Examine wiring and conduit for damage from weather, pests, or physical impact. Schedule professional inspections every few years to catch issues your own checks might miss.
Roof integrity monitoring protects both your building and your solar investment. Inspect the roof surface around panel mounts for signs of water intrusion, deteriorating sealant, or damaged flashing. Check attic spaces below the array for moisture, stains, or other evidence of leaks. Address any roofing problems immediately because small leaks quickly become major damage requiring expensive repairs. Coordinated solar panel maintenance and roof care ensures both systems function optimally throughout their service lives.
“A San Diego case study documented a 30% efficiency improvement after addressing shading problems, correcting inverter sizing, and repairing faulty wiring connections. The homeowner’s system went from underperforming expectations to exceeding projected output, demonstrating how systematic troubleshooting recovers lost savings.”
Solar panel degradation occurs gradually over decades, with quality modules losing approximately 0.5% output per year. This slow decline is normal and factored into system warranties and financial projections. Proper maintenance minimizes degradation by preventing accelerated wear from environmental stressors. Keep detailed maintenance logs documenting cleaning dates, inspection findings, and any repairs performed. These records help identify trends, support warranty claims, and provide valuable information if you sell your property.
Battery storage integration represents an advanced optimization strategy that dramatically increases energy independence and savings potential. Solar plus storage systems capture excess daytime production for use during evening peak hours or grid outages. This capability offsets two thirds of energy limiting behaviors and reduces reliance on expensive utility power during high rate periods. Battery costs continue declining, making storage increasingly attractive for homeowners and businesses seeking maximum energy security.
Troubleshooting systematic performance issues requires methodical diagnosis. Compare actual production to predicted values accounting for weather variations. Isolate problems by checking individual components such as specific panels, strings, or inverters. Use monitoring data to identify patterns like consistent underperformance at certain times of day or during specific conditions. Consult with your installer or a qualified technician when problems exceed your troubleshooting capabilities. Following a structured energy savings workflow helps identify and resolve issues efficiently.
Optimize your energy savings with expert roofing and solar solutions
Transforming energy efficiency goals into reality requires expertise, precision, and reliable execution. While this guide provides the knowledge framework, professional implementation ensures you avoid costly mistakes and achieve optimal results. Sunflowers Energy LLC specializes in integrated solar and roofing solutions designed to maximize your savings and system performance. Their comprehensive approach handles every aspect from initial assessment through ongoing maintenance, eliminating the complexity of coordinating multiple contractors.
Experienced professionals bring valuable insights that generic online resources cannot match. They understand local building codes, utility requirements, and regional climate factors affecting your specific installation. Their established relationships with equipment suppliers ensure access to quality components at competitive prices. Professional installation includes warranties covering both workmanship and materials, protecting your investment for years to come. Explore proven solar installation guidance, expert panel maintenance services, and comprehensive roofing solutions from a single trusted partner committed to your long term success.
FAQ
What is the first step in the energy savings optimization process?
The first step involves a comprehensive site assessment examining your energy consumption patterns, roof condition, and shading factors. Collect 12 months of utility bills to establish baseline usage, then evaluate roof age, materials, and structural integrity to determine if repairs or replacement are needed before solar installation. Professional roof inspection during this stage identifies hidden issues that could delay your project or require unexpected repairs later.
How can shading affect my solar energy savings?
Shading reduces solar output dramatically, sometimes by 30% or more depending on severity and duration. Even partial shade on a few panels can impact entire string performance in traditional systems. Using Module Level Power Electronics like microinverters or power optimizers allows each panel to operate independently, maintaining efficiency even when some modules experience shade throughout the day.
What maintenance is required to keep my solar and roofing system efficient?
Routine cleaning removes dirt, leaves, and debris that block sunlight and reduce panel efficiency. Schedule cleanings two to four times yearly depending on your environment. Periodic inverter checks identify error codes or malfunctions before they cause significant energy losses. Annual roof inspections around panel mounts prevent water intrusion and structural problems. Following a regular maintenance schedule minimizes the normal 0.5% annual degradation and extends system lifespan.
How long does it take to see return on investment from energy optimization?
Payback periods typically range from 6 to 12 years depending on system cost, available incentives, energy prices, and consumption patterns. Bundling roof upgrades with solar installation often shortens payback by reducing combined project costs and eliminating the need for future panel removal. Higher energy rates and better system design accelerate returns, while quality maintenance ensures maximum production throughout the system’s 25 to 30 year lifespan.
Should I add battery storage to my solar system?
Battery storage makes sense if you experience frequent outages, face time of use electricity rates, or want maximum energy independence. Solar plus storage systems capture excess daytime production for evening use, reducing grid reliance and providing backup power during outages. While batteries add upfront cost, they can offset two thirds of energy limiting behaviors and significantly increase total savings in areas with high peak electricity rates or unreliable grid service.
Recommended
- Solar drives sustainability and cuts costs by 30% in 2026 – Sunflowers Energy LLC A Roofing and Solar Companys
- Why upgrade to solar panels: cut bills by 70% and add 4.1% home value – Sunflowers Energy LLC A Roofing and Solar Companys
- How roofing boosts energy savings and solar efficiency – Sunflowers Energy LLC A Roofing and Solar Companys
- Solar Energy Efficiency Guide for Maximized Home Savings – Sunflowers Energy LLC A Roofing and Solar Companys
