Busy city life brings constant challenges for homeowners, especially when monthly energy bills keep climbing. Making your property more efficient and sustainable is no longer just a trend—it is a smart move that adds lasting value. This guide walks you through practical steps, from assessing your roof’s sunlight exposure using the NREL’s PVWatts Calculator to comparing premium solar materials and understanding warranty protections, empowering you to make informed decisions for a stronger, greener American home.
Table of Contents
- Step 1: Assess Your Property’s Solar Potential
- Step 2: Compare Premium Solar Roofing Materials
- Step 3: Review Installation and Warranty Options
- Step 4: Verify Quality and Energy Performance
- Step 5: Request Personalized Quotes and Inspections
Quick Summary
| Key Point | Explanation |
|---|---|
| 1. Assess Solar Potential First | Evaluate sunlight exposure, roof angle, and shading sources to determine your roof’s solar viability. |
| 2. Compare Solar Materials | Understand different solar roofing materials regarding efficiency, cost, and suitability for your roof. |
| 3. Check Installation and Warranties | Ensure your installer is licensed and insured; review warranties for equipment and workmanship carefully. |
| 4. Verify Quality Standards | Request performance data and certifications for all components to ensure system reliability and efficiency. |
| 5. Get Multiple Quotes and Inspections | Compare at least three installers for accurate pricing and professional assessments of your specific roof conditions. |
Step 1: Assess Your Property’s Solar Potential
Before you invest in solar roofing, you need to understand whether your property gets enough sunlight to make the system worthwhile. This step determines your home’s actual solar potential and helps you make an informed financial decision.
Start by evaluating your property’s sun exposure. Look at your roof from different angles and note which sections receive direct sunlight throughout the day. Pay attention to trees, buildings, or other structures that cast shadows on your roof, especially during peak solar hours (9 a.m. to 3 p.m.). Morning shadows from trees on the east and afternoon shadows from trees on the west are the biggest culprits that reduce solar production.
Check your roof’s orientation and tilt angle. South-facing roofs in the Northern Hemisphere capture the most solar energy. If your roof faces southeast or southwest, you’ll still generate good power, though not optimally. North-facing roofs produce significantly less and generally aren’t suitable for solar installations.
Use online tools to get precise data about your location’s solar potential. The NREL’s PVWatts Calculator estimates how much energy your system will produce based on your address, roof specifications, and system size. Enter your location, and it provides monthly and annual energy output projections.
Consider your climate zone. Properties in sunnier regions like Arizona, California, and Florida naturally have higher solar potential. Even cloudy areas like the Pacific Northwest can benefit from solar, though solar radiation monitoring data shows production varies seasonally. Urban locations may face additional shading from nearby buildings.
Gather your property details:
- Roof age and condition (solar works best on roofs with at least 10-15 years of life remaining)
- Available roof space (you need roughly 400-500 square feet for a typical residential system)
- Current electricity usage and bills (shows if solar makes financial sense)
- Local utility rates and net metering policies
Document what you find. Take photos of your roof from multiple angles, note shadow patterns throughout the day, and write down measurements. This information becomes crucial when you talk to solar professionals.
This summary table highlights key factors that influence your property’s solar suitability:
| Factor | Best Case Scenario | Impact on Solar Output |
|---|---|---|
| Roof Orientation | South-facing in Northern US | Maximizes energy capture |
| Sun Exposure | No shading 9am–3pm | Essential for high yield |
| Roof Age/Condition | 10+ years remaining | Ensures longevity |
| Climate | Sunny, mild summers | Higher year-round output |
Your roof’s solar potential directly impacts your payback period and long-term savings, making this assessment the foundation of your entire solar roofing decision.
Pro tip: Check your electric bills from the past 12 months to identify seasonal usage patterns, then use those numbers with the PVWatts Calculator for the most accurate savings projections.
Step 2: Compare Premium Solar Roofing Materials
Now that you know your property’s solar potential, it’s time to understand the different solar roofing materials available. Each type has distinct advantages, costs, and efficiency levels that affect your long-term savings and system performance.
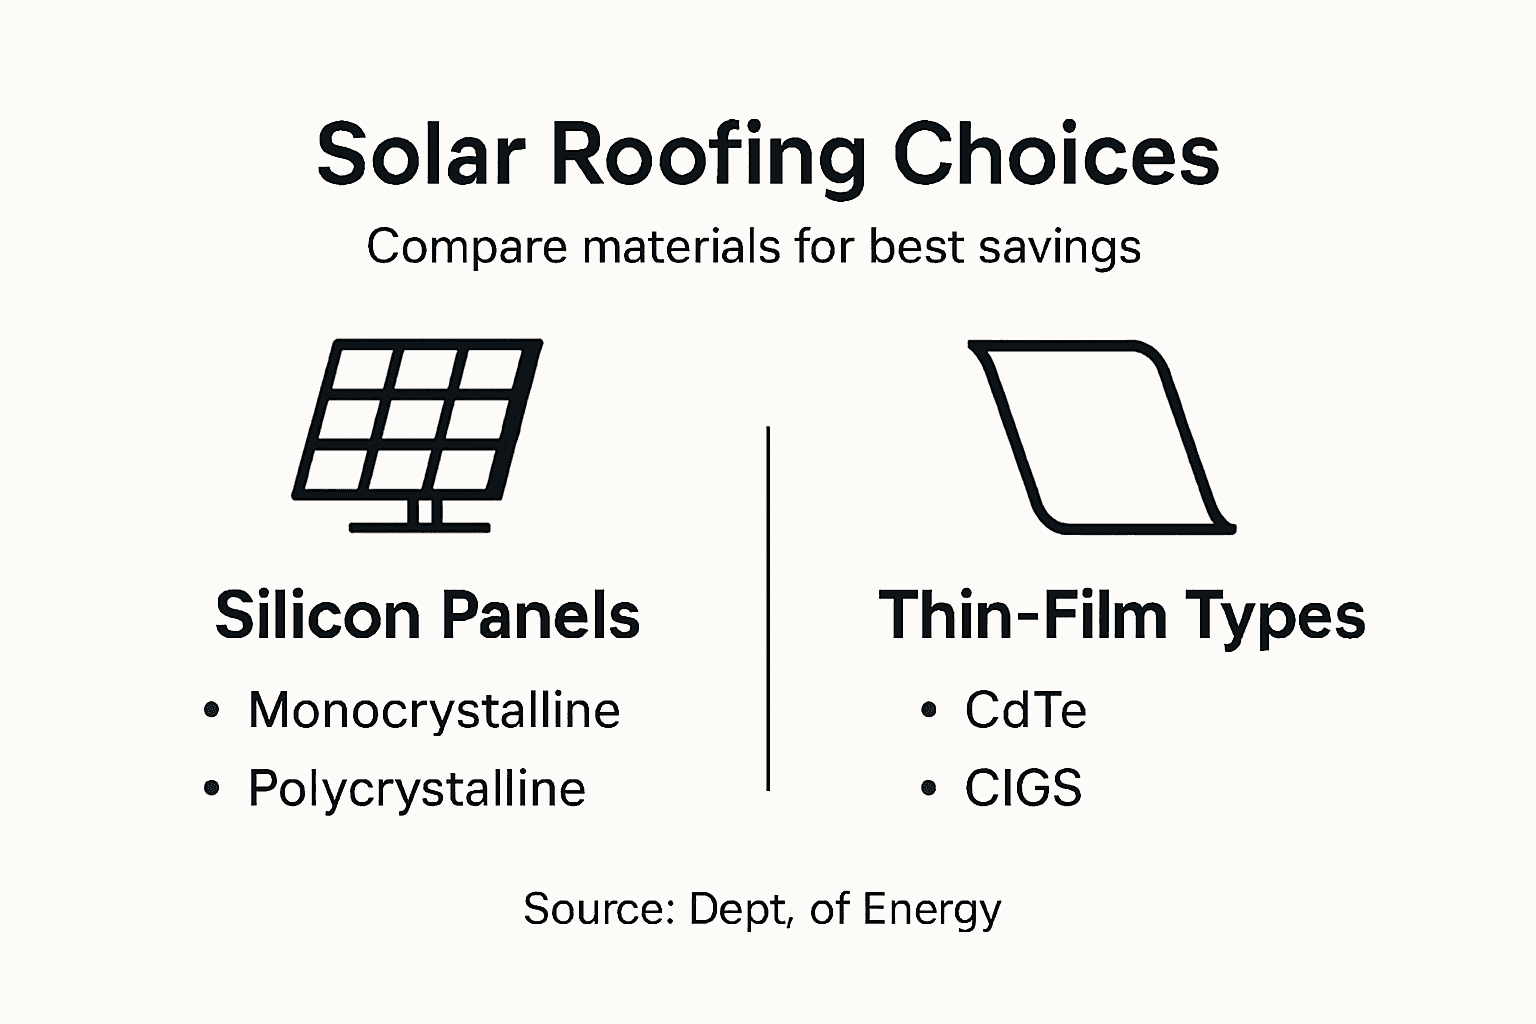
The most common option is crystalline silicon, which dominates the residential market. These panels come in monocrystalline and polycrystalline varieties. Monocrystalline silicon offers higher efficiency rates, typically 17-22%, making them ideal for smaller roofs where space is limited. Polycrystalline panels cost less but deliver slightly lower efficiency around 15-17%. Both are durable, proven performers that last 25-30 years.
Thin-film technologies like CdTe and CIGS represent the next tier of materials. These options are lighter, more flexible, and perform better in low-light conditions and high temperatures. They’re excellent for urban environments where traditional panels might not fit. However, they require more roof space for the same power output since their efficiency ranges from 10-15%.
Building-integrated photovoltaics (BIPV) merge roofing and solar generation into one. These materials actually replace your traditional roofing material rather than sitting on top of it. They look sleeker, boost home aesthetics, and eliminate the need for separate installation. Different photovoltaic materials continue to evolve, with newer options like perovskites showing promise for future residential use.
Compare your material options by evaluating:
- Efficiency rating (higher percentage converts more sunlight to electricity)
- Cost per watt installed (includes materials and labor)
- Durability and warranty length (25-30 years is standard)
- Aesthetic appeal and how it looks on your home
- Temperature coefficient (how performance drops in heat)
- Local climate compatibility and weather resistance
The U.S. Department of Energy provides comprehensive comparisons of solar roofing technologies to help you understand which materials suit different applications. Your solar installer can recommend options based on your roof type, climate, and budget.
Here’s a concise comparison of premium solar roofing materials to help guide your decision:
| Material Type | Typical Efficiency (%) | Visual Integration | Roof Space Needed |
|---|---|---|---|
| Monocrystalline Silicon | 17-22 | Standard profile | Least, very efficient |
| Polycrystalline Silicon | 15-17 | Standard profile | More than mono |
| Thin-Film (CdTe, CIGS) | 10-15 | Sleek and flexible | Most, lowest efficiency |
| Building-Integrated Photovoltaics | 12-18 | Fully integrated | Tailored, replaces roof |
Premium materials don’t always mean the highest efficiency—they mean the right balance of performance, durability, and value for your specific home and location.
Pro tip: Request samples or photos of installed systems using your preferred material in homes similar to yours, then check those homeowners’ actual energy production data to validate manufacturer claims.
Step 3: Review Installation and Warranty Options
Installation quality and warranty coverage make or break your solar roofing investment. This step ensures you understand what protections you’re getting and how to verify your installer meets industry standards.
Start by checking your installer’s licensing and insurance credentials. Verify they hold proper state licensing for solar installation and electrical work. Request proof of general liability and workers’ compensation insurance. Licensed installers follow building codes and safety standards that protect both you and your home.
Understand the two main warranty types offered. Equipment warranties cover the solar panels and inverters themselves, typically lasting 25-30 years. Workmanship warranties cover the installation quality and labor, usually running 10 years. Some installers offer extended coverage that combines both into one comprehensive package.
Review warranty terms carefully before signing anything. Check what’s actually covered, what voids the warranty, and how claims are processed. Some warranties exclude damage from extreme weather or misuse. Ask about the warranty transfer process if you sell your home, since this adds significant value to potential buyers.
Your installer should provide documentation of installation standards and licensing requirements that govern their work. Professional installations meet building codes and safety specifications designed to protect your home from electrical hazards and structural damage.
Key questions to ask installers:
- What specific equipment and workmanship warranties do you provide?
- Are warranties transferable if I sell my home?
- What happens if a panel fails within warranty years?
- How quickly do you process warranty claims?
- Does your warranty cover weather damage, including hail and storms?
- What certifications and licenses do you hold?
Consult consumer guides on rooftop solar for detailed information about warranty options and verification steps specific to your state. Requirements vary, but reputable installers welcome transparency about their credentials.
Strong warranty coverage reflects installer confidence in their work and protects your 25-year investment against unexpected failures.
Pro tip: Request written warranty documents from at least three installers, then compare coverage side by side in a spreadsheet to spot differences in duration, exclusions, and claim procedures.
Step 4: Verify Quality and Energy Performance
Before you commit to a solar roofing system, verify that both the materials and installation meet rigorous quality standards. This step protects your investment and ensures your system delivers the energy savings promised.
Request performance monitoring data from your installer. Most modern solar systems include monitoring software that tracks real-time energy production. Ask for baseline projections and how the system will be monitored after installation. You should be able to check your system’s output monthly to confirm it’s performing as expected.
Look for quality certifications on all components. Solar panels should carry certifications from independent testing organizations. Inverters and mounting hardware also need certification marks showing they meet industry standards. Your installer can provide documentation proving all equipment meets safety and performance requirements.
Understand the Solar Reflectance Index (SRI) if you’re installing integrated roofing systems. This metric measures how much solar energy a roofing material reflects versus absorbs, directly affecting cooling costs and energy efficiency. Higher SRI ratings mean better heat reflection and lower cooling loads, translating to real savings on summer energy bills. The Cool Roof Rating Council provides standardized ratings for roofing materials so you can compare performance objectively.
Verify your system meets regional solar standards. Coordinated solar standards and certification efforts ensure products and installations pass rigorous quality checks. Ask your installer if they comply with these standards and what certifications they hold.
Key performance verification steps:
- Request manufacturer specifications for efficiency ratings and temperature coefficients
- Get written production estimates for your first year and 25-year lifetime
- Ask how the system will be tested after installation before final payment
- Request access to performance monitoring software or apps
- Confirm all equipment carries relevant certifications and warranties
Don’t just trust estimates. Ask for references from similar installations in your area, then contact those homeowners about actual versus projected performance. Real-world data beats marketing promises every time.
Quality verification isn’t about paperwork—it’s about ensuring your system actually generates the savings you’re counting on.
Pro tip: Request a third-party system audit before final payment, which costs $300-500 but verifies installation quality and confirms your system will meet projected energy production targets.
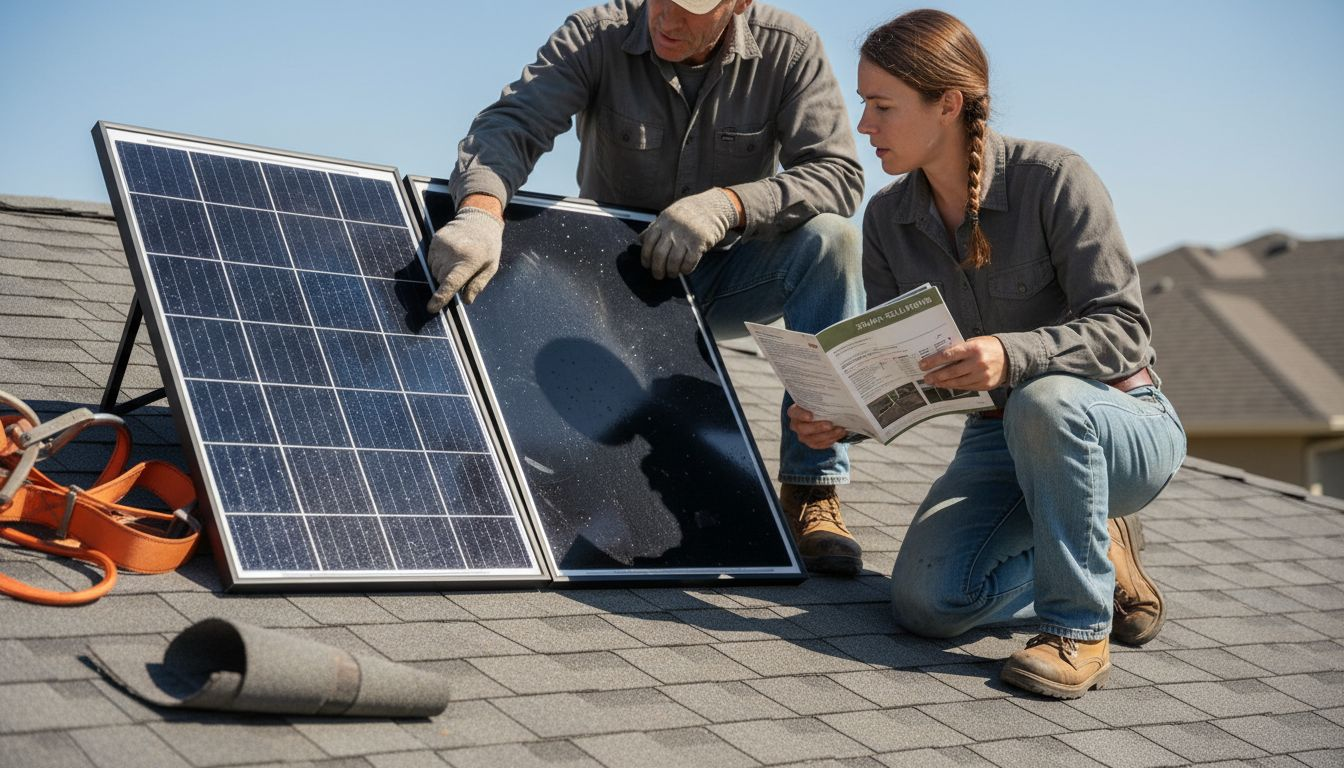
Step 5: Request Personalized Quotes and Inspections
Now it’s time to get concrete numbers and professional assessments from actual solar installers. This step transforms all your research into actionable quotes that let you compare real pricing and options side by side.
Start by identifying licensed solar installers in your area. Use the National Solar Licensing Database to find installers who meet regulatory standards and hold proper credentials. Verify their licenses, check reviews, and confirm they’re actively installing systems in your region.
Request quotes from at least three different installers. Each company should provide a detailed breakdown showing equipment costs, labor, permits, and financing options. Don’t settle for phone estimates. Legitimate installers conduct on-site inspections before quoting, which costs nothing and gives you accurate numbers based on your specific roof conditions.
Schedule professional roof inspections with each installer. They’ll assess your roof’s age, condition, structural capacity, and shading patterns. This inspection is free and typically takes 30-45 minutes. The inspector photographs your roof and documents findings that directly affect system design and pricing.
Use online tools to generate baseline estimates before meeting with installers. Personalized solar cost and savings estimates based on your home’s specifics help you know if quotes are in the reasonable range. Input your location, electricity usage, and roof characteristics to get preliminary numbers.
During inspections, ask installers these important questions:
- How many kilowatts will the system produce annually for my home?
- What’s the estimated payback period and 25-year savings total?
- Which financing options do you offer (cash, loans, leasing, power purchase agreements)?
- Can you show examples of similar installations you’ve completed?
- What happens if my roof needs repairs before installation?
- How long until the system is operational after signing?
Compare quotes carefully beyond just the bottom-line price. Evaluate warranty terms, equipment quality, company reputation, and proposed timeline. The cheapest option isn’t always the best value.
Getting quotes from multiple installers reveals market rates in your area and ensures you’re not overpaying for quality work.
Pro tip: Create a comparison spreadsheet listing price, warranty, equipment brands, estimated production, and financing options from each quote, then rank them by total value rather than cost alone.
Maximize Your Savings with Expert Solar Roofing Solutions
Choosing the right solar roofing system involves understanding your property’s sun exposure, selecting premium materials, and securing trustworthy installation with solid warranties. If you feel overwhelmed by assessing roof orientation, comparing efficiency ratings, or navigating warranty options, you are not alone. These crucial steps determine your long-term energy savings and home protection.
At Sunflowers Energy, we specialize in guiding homeowners and businesses through this complex process. Our team offers comprehensive services including detailed roof inspections, personalized solar system design using premium materials, and reliable installation backed by industry-leading warranties. Discover how cutting-edge technology and expert craftsmanship combine to deliver the performance and durability your property deserves.
Start your journey toward sustainable energy savings now by scheduling a free onsite inspection with our experts. Explore premium solutions tailored to your home’s unique needs at Sunflowers Energy. Learn more about our trusted approach and client success stories in the 1win Brazil – Sunflowers Energy LLC A Roofing and Solar Companys category. For holistic roofing and solar guidance, visit the main landing page. Take control of your energy future today with proven solutions that pay off. Reach out and get a personalized quote designed to maximize your solar savings.
Frequently Asked Questions
How do I assess my property’s solar potential?
To assess your property’s solar potential, evaluate your roof’s sun exposure, orientation, and any shading from nearby trees or buildings. Inspect your roof during peak solar hours and document measurements to share with solar professionals for a more accurate assessment.
What types of solar roofing materials should I consider for maximum savings?
Consider materials like monocrystalline and polycrystalline silicon for their efficiency and durability. Weigh the performance, cost per watt installed, and aesthetic appeal of each option, especially if your roof space is limited.
How do I verify the quality of a solar installation?
Verify installation quality by checking the installer’s licensing, insurance, and warranties for both equipment and workmanship. Request documentation of their credentials and certifications to ensure your system meets safety and performance standards.
What should I ask installers when getting quotes for solar roofing?
When getting quotes, ask about the system’s expected annual energy production, payback period, and financing options available. Clarify warranty terms and what happens if repairs are needed before installation to ensure you fully understand the scope and timeframe of your project.
How can I compare quotes from different solar installers?
Create a comparison spreadsheet to list the equipment, warranty terms, estimated production, and financing options from each quote you receive. This method allows for a clear visual comparison to ensure you’re choosing the best value for your solar roofing investment.
Recommended
- Why Choose Solar Roofing: Savings, Durability, Value – Sunflowers Energy LLC A Roofing and Solar Companys
- Solar Energy Efficiency Guide for Maximized Home Savings – Sunflowers Energy LLC A Roofing and Solar Companys
- Benefits of Solar Roofing: Transforming Home Efficiency – Sunflowers Energy LLC A Roofing and Solar Companys
- 7-Step Solar Roofing Checklist for Urban Homeowners – Sunflowers Energy LLC A Roofing and Solar Companys
