A bad storm rolls through, you spot missing shingles or a leak in the ceiling, and suddenly you’re facing a repair bill you didn’t plan for. Your first thought is probably your homeowner’s insurance, but then the questions start piling up. How does a roof insurance claim work, exactly? What do you need to document? Will the insurance company actually cover the full cost? These are the kinds of questions we hear from homeowners every week at Sunflowers Energy LLC, and the answers aren’t always straightforward.
The roof insurance claim process involves several moving parts, from filing the initial claim and meeting with an adjuster, to understanding your deductible and figuring out how (and when) you’ll actually get paid. Each step has its own timeline, potential pitfalls, and decisions that can directly affect how much money ends up in your pocket. Skipping a step or missing a detail can mean a reduced payout or an outright denial.
As a roofing and solar company that regularly works alongside homeowners during insurance claims, we’ve walked hundreds of clients through this process from start to finish. We’ve seen what works, what delays things, and where homeowners lose money without realizing it. This guide breaks down the entire roof insurance claim process step by step, covering documentation, adjuster inspections, payout structures, deductibles, and how a roofing contractor fits into the picture, so you can handle your claim with confidence and get the coverage you’re owed.
What a roof claim covers and key terms
Before you dive into how does a roof insurance claim work in practice, you need to understand what your policy actually covers and what the terminology means. Most standard homeowner’s insurance policies cover sudden and accidental damage, such as wind, hail, fire, and falling objects. What they typically don’t cover is wear and tear or neglect, which is a distinction that matters enormously when the adjuster evaluates your roof.
What your policy typically covers
Your homeowner’s insurance generally breaks roof coverage into two categories: covered perils and excluded perils. Covered perils are specific events your insurer agrees to pay for, and the most common ones include hail damage, wind damage, fire, lightning, and falling trees or branches. Excluded perils are the events your insurer won’t pay for, which usually include gradual deterioration, improper installation, and maintenance-related issues like moss buildup or cracked caulking around vents and flashing.
If your roof is over 20 years old, some insurers will only pay actual cash value rather than the full replacement cost, which can significantly cut your payout.
Your policy type also shapes what you can claim. An open perils (also called "all-risk") policy covers everything except what’s explicitly excluded. A named perils policy only covers events specifically listed in the document. Pull out your declarations page and confirm which type you have before you file anything.
Key terms you need to know
Understanding the terminology prevents surprises when the adjuster arrives and the payout paperwork starts flowing. These are the core terms every homeowner needs to know before filing a roof insurance claim:
| Term | What it means |
|---|---|
| Deductible | The amount you pay out of pocket before insurance covers the rest |
| ACV (Actual Cash Value) | Replacement cost minus depreciation based on your roof’s age and condition |
| RCV (Replacement Cost Value) | The full cost to replace your roof with similar materials, no depreciation deducted |
| Recoverable Depreciation | The gap between ACV and RCV that you can claim after repairs are completed |
| Scope of Loss | The written list of all damage the adjuster documents during the inspection |
| Proof of Loss | A formal statement you submit to your insurer confirming your claim details |
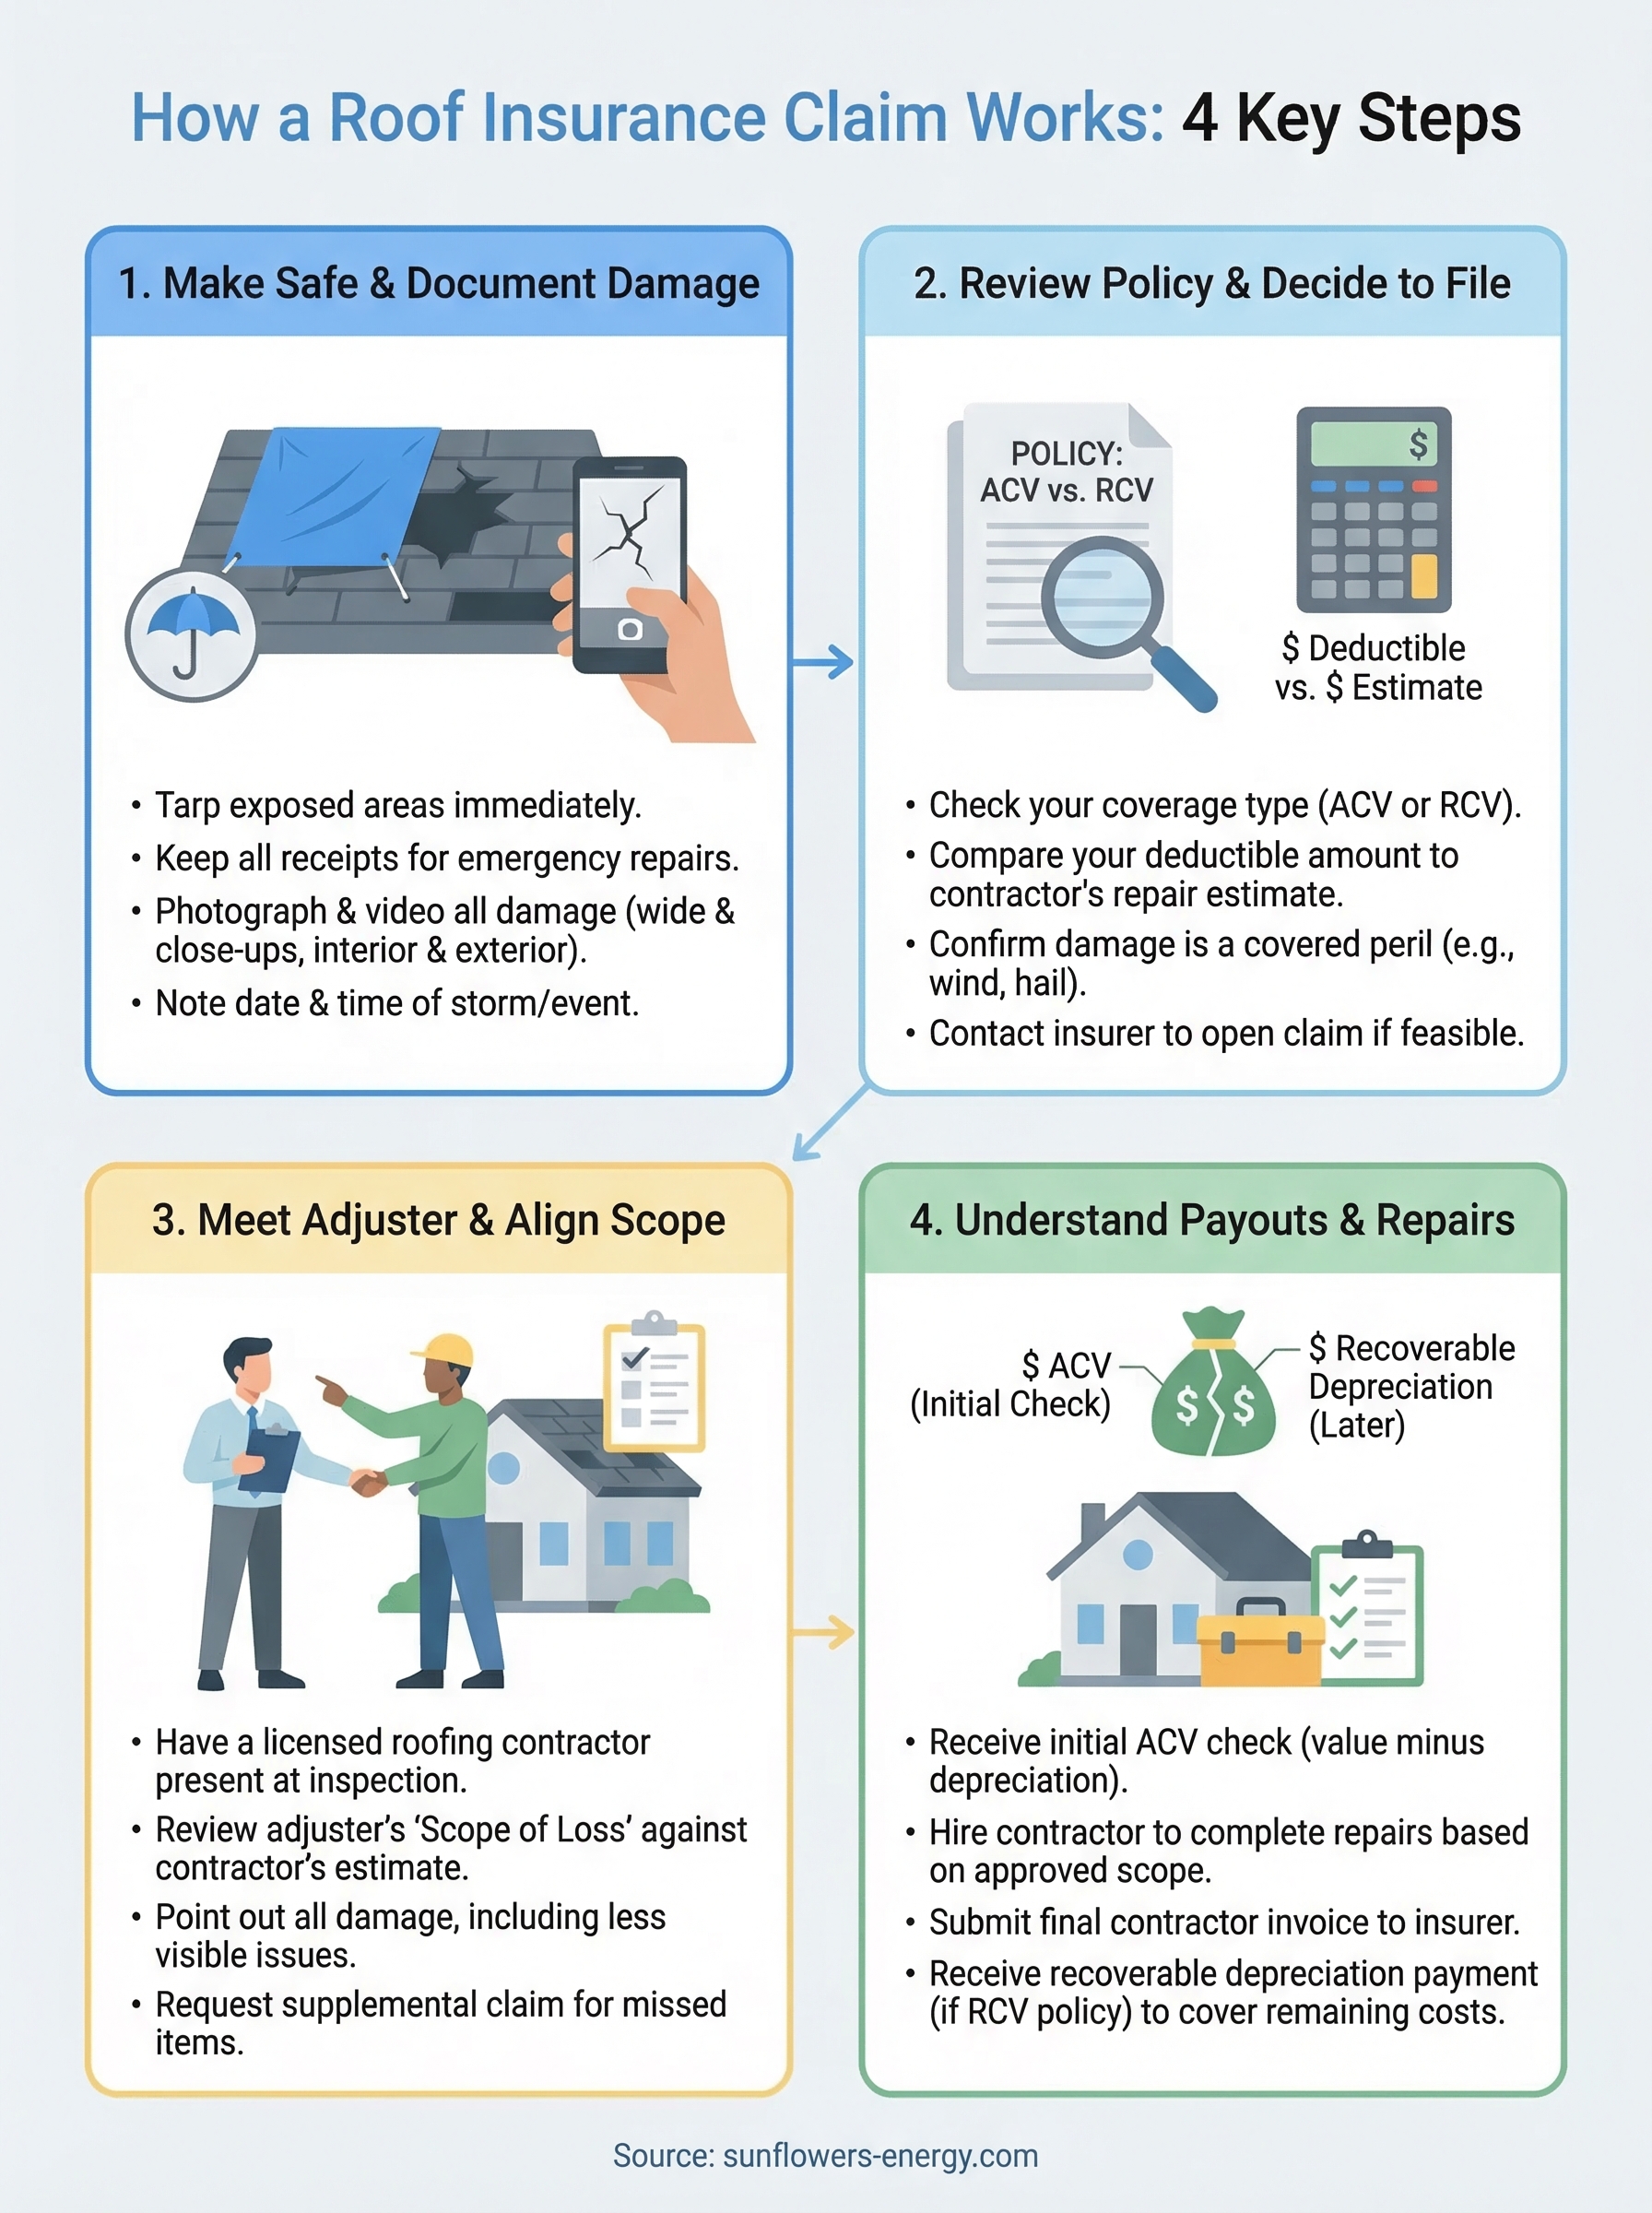
Step 1. Make the site safe and document damage
Before you call your insurer or pick up the phone to schedule an inspection, your first priority is stopping additional damage from happening. Insurance companies can reduce your payout if they determine that secondary damage occurred because you failed to take reasonable steps to protect the property after the initial event. Understanding how does a roof insurance claim work means recognizing that your actions in the first 24 to 48 hours directly affect the outcome.
Secure the roof before anything else
Hire a roofing contractor to install a temporary tarp or protective covering over any exposed areas right away. Don’t climb on a damaged roof yourself, especially after a storm when surfaces are wet or structurally compromised. Keep every receipt from emergency protection work you pay for, because most insurers reimburse these costs as part of your claim, but only if you document them properly.
Save all receipts and written estimates for temporary repairs. Your insurer typically covers these costs, but you need proof of what you spent and why.
Document the damage thoroughly
Once the site is secure, photograph and video every area of visible damage before any repairs begin. Walk the perimeter of the house, capture the roof from ground level, and document interior damage such as water stains or soaked insulation. Use this checklist to make sure your documentation holds up:
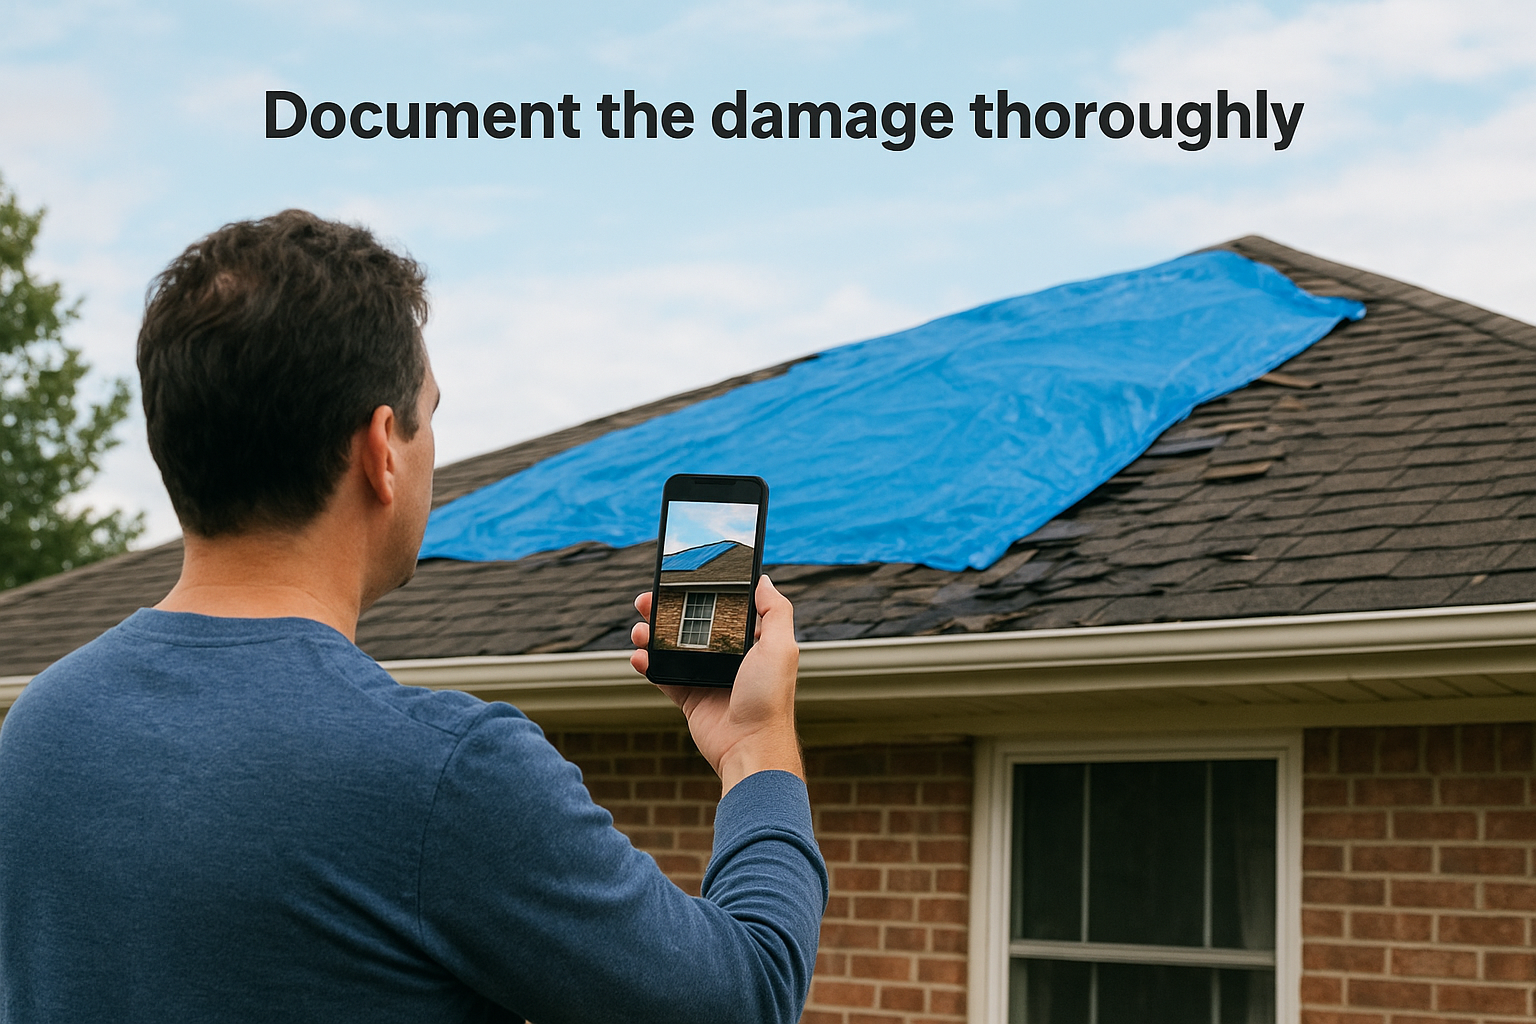
- Date and time-stamp all photos and videos
- Capture wide shots and close-ups of each damaged area
- Document interior damage linked to the roof (ceilings, walls, insulation)
- Note damaged gutters, skylights, or flashing
- Record the storm date, type, and any local weather reports confirming the event
Step 2. Review your policy and decide to file
Before you call your insurer, pull out your declarations page and your full policy document. You need to understand your coverage limits, your deductible amount, and whether your policy covers the type of damage you sustained. One of the most overlooked aspects of how does a roof insurance claim work is the decision to file in the first place, because filing when the math doesn’t work in your favor can cost you more in the long run through premium increases.
Check your deductible against the repair estimate
Your deductible is the amount you pay before insurance covers anything, so you need a contractor’s written estimate in hand before you decide to file. If your deductible is $2,500 and the repair estimate comes in at $3,000, filing a claim for $500 in net coverage may not be worth triggering a potential rate increase on your policy.
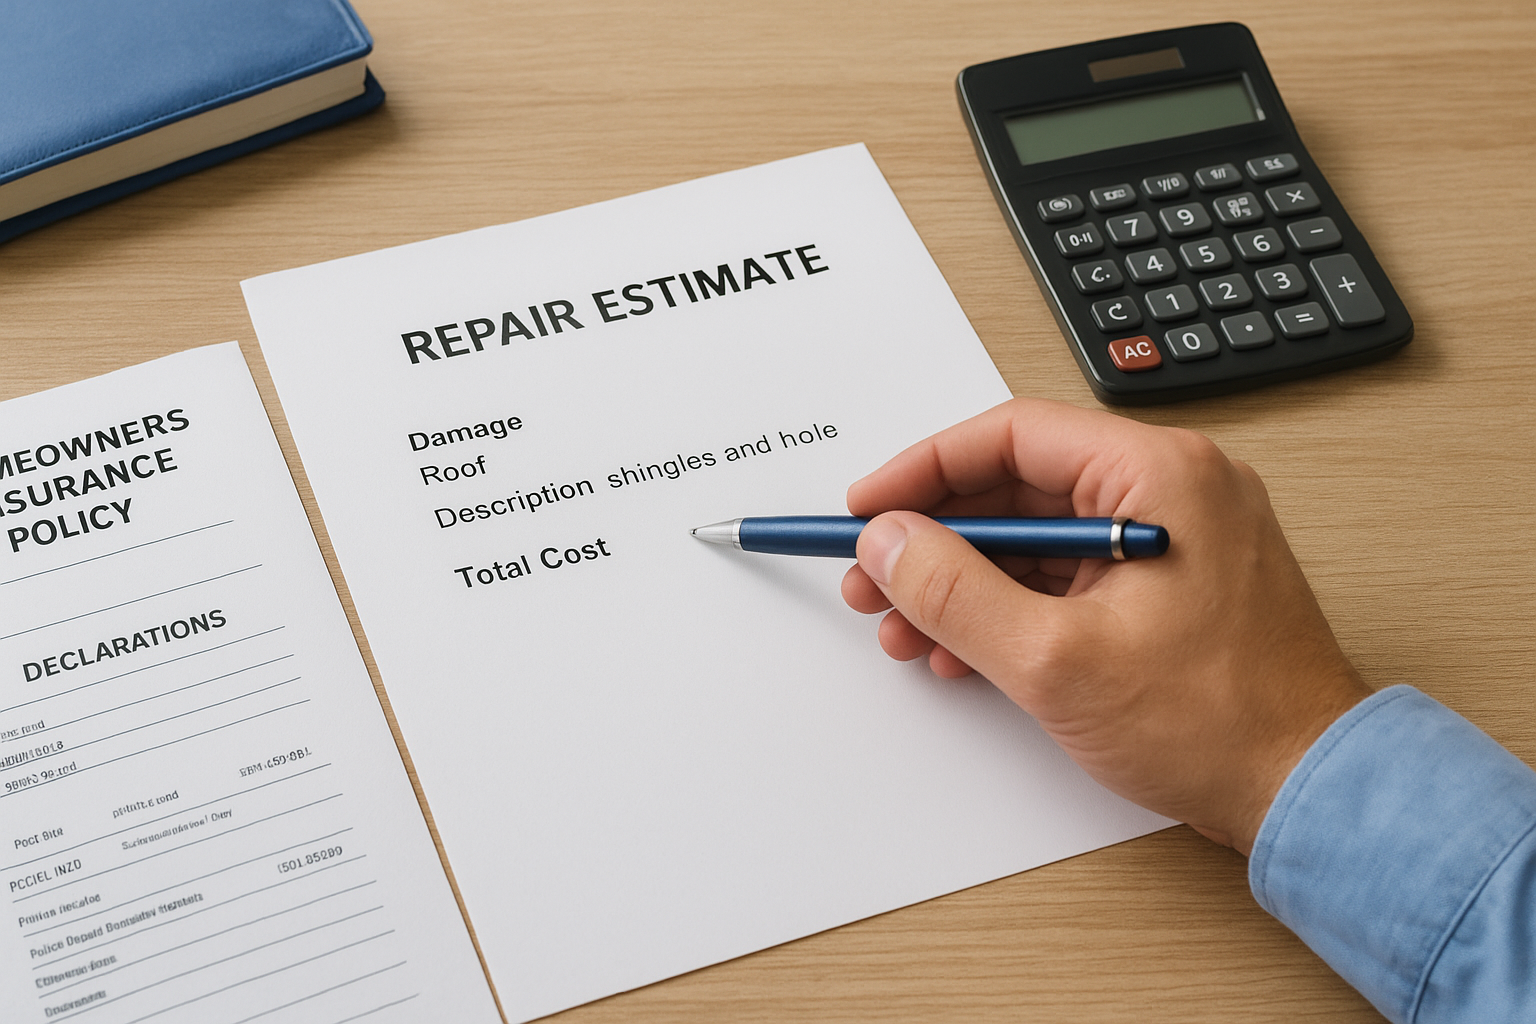
Get at least two written estimates from licensed contractors before you call your insurer, so you know exactly what you’re dealing with.
Use this checklist before you pick up the phone:
- Confirm the damage was caused by a covered peril (wind, hail, fire, or falling objects)
- Compare your deductible to the full repair or replacement cost
- Check whether you’ve filed another claim recently, since multiple claims can raise your premium
- Verify your policy type (ACV vs. RCV) so you understand how depreciation affects your payout
How to notify your insurer
Contact your insurance company by phone or through their official online portal to open the claim. Have your policy number, the storm date, and your photo documentation ready before you call. Most insurers require you to file within a specific window after the damage occurs, so check your policy for the exact deadline and don’t let it pass.
Step 3. Meet the adjuster and align on the scope
The adjuster your insurer sends is there to document the scope of loss, which becomes the direct basis for your payout. Understanding how does a roof insurance claim work at this stage matters because the adjuster’s written report determines what your insurer will pay. You have every right to be present, ask questions, and push back on findings you disagree with.
Have a licensed roofing contractor present during the adjuster’s inspection. Their expertise can catch damage the adjuster overlooks, which directly protects your final payout.
Prepare before the adjuster arrives
Schedule the inspection quickly after opening your claim, since most insurers require it within a specific timeframe. Before the adjuster arrives, gather your timestamped photo documentation, your contractor’s written estimate, and any receipts for emergency tarp or protective work you’ve completed. Having this paperwork organized puts you in a much stronger position.
- Organize photos by damage area with clear labels
- Bring your contractor’s written estimate to compare with the adjuster’s scope
- Note less visible damage such as flashing, ridge caps, and gutters
- Keep a written record of everything the adjuster documents or skips
When the adjuster misses damage
Adjusters handle large caseloads and sometimes miss less visible damage like cracked flashing, damaged ridge caps, or compromised underlayment. If your contractor’s estimate includes items the adjuster’s scope does not, request a supplemental claim in writing and attach your contractor’s documentation as supporting evidence.
Submit itemized photos alongside the supplemental request to give your insurer clear, specific proof of what was missed. Most insurers will reopen the scope when you back your request with solid documentation.
Step 4. Understand payouts, repairs, and closing
Once the adjuster finalizes the scope of loss, your insurer sends a claim summary and initial payment. This is where understanding how does a roof insurance claim work becomes critical, because most homeowners don’t realize they typically receive two separate payments rather than one lump sum, and knowing the difference determines how you manage your contractor and the repair timeline.
How your payout is structured
Your first check covers actual cash value (ACV), which is the replacement cost of your roof minus depreciation. If you carry an RCV policy, the insurer holds back the recoverable depreciation until you complete repairs and submit your final contractor invoice. Here is how that sequence works in practice:
- Insurer sends ACV check after approving the scope
- You hire your contractor and repairs begin
- You submit the final invoice to your insurer after completion
- Insurer releases the recoverable depreciation payment
Submit your contractor’s final invoice to your insurer immediately after repairs are complete to unlock the recoverable depreciation payment without delay.
Paying your contractor and closing the claim
Your roofing contractor works from the approved scope of loss, completing repairs to match what the adjuster documented. Once the work is done, review the final invoice against the scope line by line before submitting it to your insurer. If your mortgage lender is listed on the claim check, they must endorse it before you can deposit the funds, which adds a few extra business days to the process.
After your insurer processes the final invoice and releases the depreciation payment, your claim officially closes. Keep all receipts and correspondence in one folder for at least three years.
Next steps after you file
Now that you understand how does a roof insurance claim work from documentation through final payment, the next move is putting that knowledge to work on your specific situation. Review your policy today, confirm your coverage type, and pull together your storm documentation before time limits on filing cut off your options.
Your roofing contractor plays a bigger role in this process than most homeowners expect. A qualified contractor will document damage accurately, attend the adjuster inspection, and submit supplemental claims when the scope falls short. Choosing the right contractor from the start protects your payout at every stage.
If your roof has been damaged by a storm and you’re ready to move forward, get a free on-site roof inspection from Sunflowers Energy LLC. Our team will build a complete damage report before you file so your claim starts on solid ground.

5 Responses