How to improve home energy efficiency: steps for savings

TL;DR:
- Conduct a home energy audit to identify inefficiencies and prioritize upgrades accordingly.
- Seal air leaks and add insulation first for maximum energy savings and ROI.
- Upgrading envelopes, systems, and roofing in the correct order enhances overall efficiency and reduces costs.
Rising utility bills have a way of making every month feel like a financial guessing game. You know something needs to change, but with so many products, rebates, and upgrades competing for your attention, it’s hard to know where to start. The good news is that improving your home’s energy efficiency doesn’t have to be overwhelming. When you follow a proven sequence, starting with a clear assessment and working through targeted improvements, you can realistically cut your energy costs by 20% to 30% or more. This guide walks you through every step, from your first audit to advanced solar and roofing strategies, so you invest in the right upgrades at the right time.
Table of Contents
- Start with a home energy audit and prioritization
- Seal air leaks and boost insulation: foundational upgrades
- Upgrade HVAC, water heating, and appliances for ongoing gains
- Maximize ROI with roofing and solar: synergies and advanced strategies
- Why order and not just action matters in energy efficiency
- Ready to boost your home’s energy efficiency?
- Frequently asked questions
Key Takeaways
| Point | Details |
|---|---|
| Start with an energy audit | A home audit shows exactly where your house wastes energy so you can target what matters most. |
| Prioritize air sealing and insulation | Sealing leaks and insulating are the most cost-effective upgrades and often deliver 20-30 percent savings. |
| Layer upgrades for maximum ROI | Making envelope improvements before HVAC and solar leads to bigger savings and faster payback. |
| Roofing and solar amplify results | Combining efficient roofing materials and solar panels after core upgrades yields the greatest long-term benefits. |
Start with a home energy audit and prioritization
Before you invest in specific upgrades, assess where your home uses and loses energy. Jumping straight into purchases without this step is like treating symptoms without a diagnosis. You might spend money on a new HVAC system while your attic is leaking conditioned air every hour of the day.
A professional home energy audit gives you a detailed map of your home’s inefficiencies. Auditors use tools like blower door tests and thermal imaging to find air leaks, poor insulation, and inefficient equipment. If a full professional audit isn’t in your budget right now, energy audit resources from ENERGY STAR can help you get started with a structured DIY approach.
The financial case for audits is strong. The IRS Energy Efficient Home Improvement Credit covers up to $150 toward audit costs, and qualifying home performance upgrades can achieve 20 to 30% total savings on your energy bills. That’s a meaningful return on a modest investment.
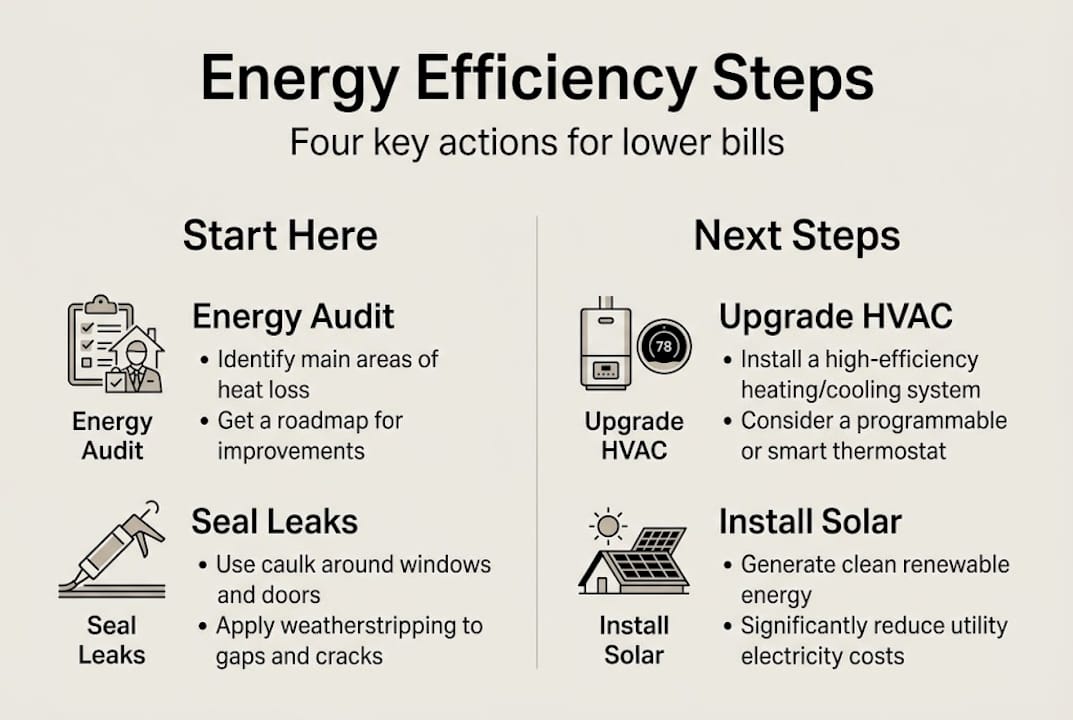
Once you have your audit results, prioritize upgrades in this order:
- Building envelope first: Air sealing and insulation deliver the highest ROI and make every other upgrade more effective.
- Mechanical systems second: HVAC, water heating, and ventilation upgrades perform better in a tighter, well-insulated home.
- Renewable energy last: Solar panels generate the most value when your home’s underlying demand is already optimized.
Pro Tip: Keep detailed records of your energy bills before and after each upgrade. This documentation also supports tax credit claims and helps you measure real-world savings at every stage.
Exploring cost-cutting energy strategies before you begin can also help you build a smarter upgrade plan. For a broader framework, the energy savings optimization guide offers a structured roadmap worth reviewing.
Seal air leaks and boost insulation: foundational upgrades
Armed with your audit results, the next step is to target the core weak points in your home’s defenses against energy loss. Air sealing and insulation are unglamorous upgrades, but they consistently outperform flashier improvements in terms of cost per dollar saved.
Sealing air leaks and adding insulation is the most cost-effective first step for improving home energy efficiency, targeting attics, walls, floors, and ducts. In practical terms, this means your heating and cooling systems work less to maintain comfort, which extends equipment life and reduces wear.
Here’s how to approach these upgrades systematically:
- Attic air sealing and insulation: Heat rises, so the attic is the single biggest source of energy loss in most homes. Seal penetrations around pipes, wires, and light fixtures before adding insulation.
- Basement and crawlspace insulation: In cold climates, these areas are major sources of heat loss. Insulating rim joists and crawlspace walls can make a noticeable difference.
- Duct sealing: Leaky ducts can waste 20% to 30% of the air your HVAC system produces before it ever reaches your living space.
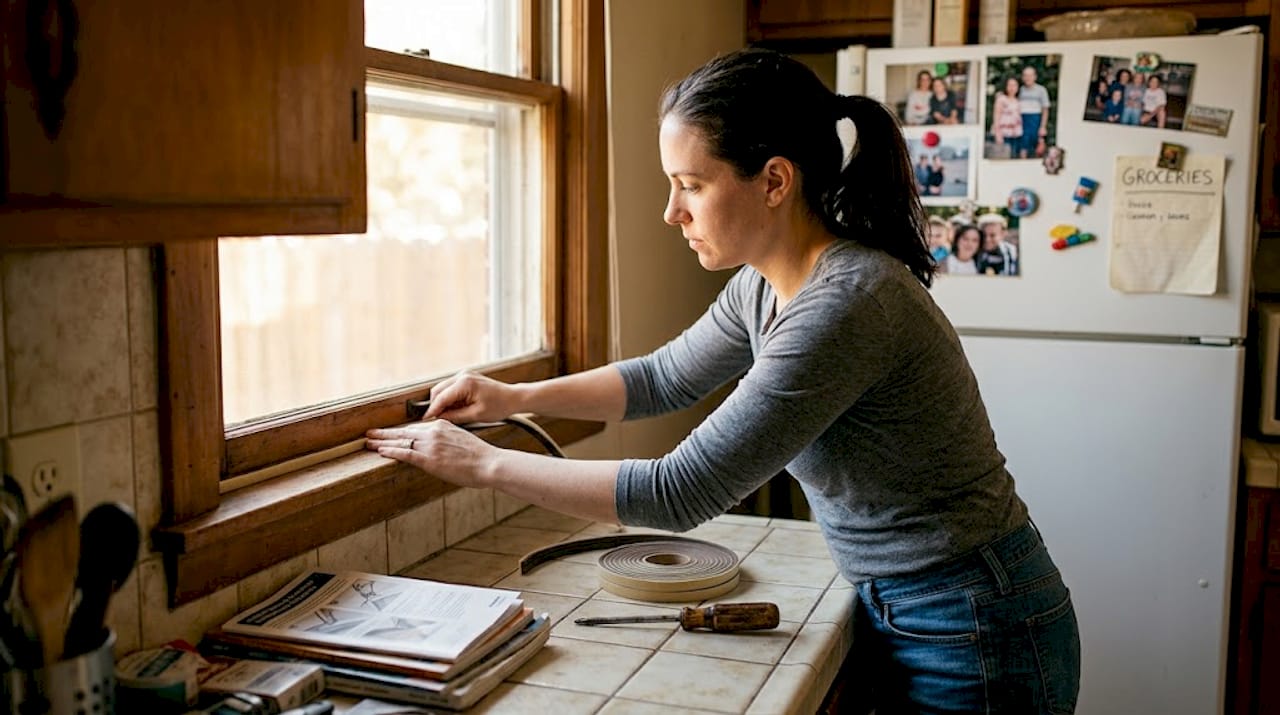
- Windows and doors: Weatherstripping and caulking are low-cost fixes. In extreme cases, upgrading to double-pane windows offers additional gains.
“The building envelope is your home’s first line of defense. Fix the shell before you upgrade the engine.”
For homeowners in hot climates, energy-efficient roofing adds another layer of protection by reflecting solar heat before it enters the attic. In cold climates, prioritize insulation depth over reflective roofing. Understanding the role of roofing in efficiency helps you make the right call for your region. For climate-specific insulation advice, regional extension resources offer detailed guidance.
| Upgrade | Avg. upfront cost | Estimated annual savings | Payback period |
|---|---|---|---|
| Attic air sealing | $150 to $500 | $200 to $400 | 1 to 2 years |
| Attic insulation | $1,000 to $2,500 | $300 to $600 | 2 to 4 years |
| Duct sealing | $300 to $1,000 | $150 to $400 | 2 to 5 years |
| Window weatherstripping | $50 to $200 | $75 to $150 | Under 1 year |
Pro Tip: Tackle attic air sealing before adding insulation. Adding insulation on top of unsealed gaps traps moisture and reduces the effectiveness of both improvements.
Upgrade HVAC, water heating, and appliances for ongoing gains
With your home envelope secured, you’re ready to address the systems that use the most energy day-to-day. This is where ongoing operational savings really add up.
Heating and cooling account for up to 50% of home energy use. That makes your HVAC system the single biggest lever for reducing monthly bills. Upgrading to an ENERGY STAR-certified heat pump, particularly after air sealing, can cut heating and cooling costs by 30% to 50% compared to older systems. Heat pumps work best in well-insulated homes, which is exactly why envelope improvements come first.
Here’s a practical upgrade sequence for mechanical systems:
- Install a programmable or smart thermostat: This is a low-cost, high-impact move. Proper scheduling alone can save 10% or more annually.
- Schedule annual HVAC maintenance: Clean filters, coils, and refrigerant checks keep your system running at peak efficiency.
- Upgrade to a heat pump water heater: Insulating water heaters and pipes can save an additional 6% to 40% on water heating costs, and heat pump models outperform conventional electric heaters significantly.
- Replace aging appliances with ENERGY STAR models: Refrigerators, dishwashers, and washing machines certified by ENERGY STAR use 10% to 50% less energy than standard models.
- Switch to LED lighting throughout: LEDs use about 75% less energy than incandescent bulbs and last up to 25 times longer.
For a deeper look at how these upgrades connect to solar savings, the solar savings guide explains how reducing demand first amplifies the value of every kilowatt your panels produce. The net-zero home guidance from the Department of Energy also outlines how these steps fit into a longer-term efficiency strategy.
| Upgrade | Estimated annual savings |
|---|---|
| Smart thermostat | $100 to $150 |
| ENERGY STAR heat pump | $400 to $900 |
| Heat pump water heater | $300 to $500 |
| LED lighting (whole home) | $100 to $250 |
| ENERGY STAR appliances | $75 to $200 |
Pro Tip: Many utility companies offer rebates for ENERGY STAR appliances and heat pumps. Check your local utility’s website before purchasing to stack savings on top of federal tax credits.
Maximize ROI with roofing and solar: synergies and advanced strategies
After improving systems inside, it’s time to look up, literally, to your roof and the power of the sun. This is where your earlier investments start to pay compounding dividends.
Your roof does more than keep out rain. It directly affects your home’s thermal performance and the output of any solar panels installed on it. Key roofing upgrades worth considering include:
- Cool roofs and reflective shingles: These materials reflect sunlight instead of absorbing it, reducing attic temperatures and lowering your HVAC load in warm climates.
- Improved attic ventilation: Proper ventilation works with insulation to prevent heat buildup and moisture damage.
- Durable, energy-efficient shingles: Premium shingles extend roof life and protect the solar investment below them.
A California Energy Commission study found that multifamily retrofits combining high-performance roofs and all-electric systems achieved a 21% electricity reduction and a 43% CO2e reduction. That’s a powerful demonstration of what integrated roofing and system upgrades can accomplish together.
Solar panels deliver their best returns after you’ve reduced your home’s underlying energy demand. A smaller, more efficient home needs fewer panels to reach net-zero, which lowers your installation cost. Exploring roofing and solar strategies together helps you design a system that’s right-sized from the start.
Federal tax credits make these advanced upgrades more attainable. Through 2032, homeowners can claim up to $3,200 per year for qualifying improvements including solar, heat pumps, insulation, and more. For a detailed breakdown of how roofing boosts solar output, the numbers are compelling. Research from home upgrade payback studies also confirms that combined strategies outperform single-measure upgrades.
Pro Tip: Pairing a cool roof with solar panels can increase PV output by up to 29% by keeping panel temperatures lower. Cooler panels are more efficient panels.
Why order and not just action matters in energy efficiency
Now that you know the steps, let’s discuss why the sequence in which you tackle improvements can make or break your results. Most homeowners focus on what to upgrade. Fewer think carefully about when.
Skipping steps or doing upgrades out of order creates real problems. Installing a large solar array on a leaky, poorly insulated home means you’re generating power to compensate for waste rather than to cover genuine demand. You end up oversizing the system and overspending. Worse, the payback period stretches out because your baseline consumption stays high.
Prioritizing envelope improvements, including air sealing, insulation, and windows, before HVAC or solar upgrades is the approach that maximizes ROI. Synergies amplify savings at every stage. A tighter envelope means a smaller HVAC system. A smaller HVAC system means lower electricity demand. Lower demand means fewer solar panels needed. Fewer panels means lower installation cost and faster payback.
The solar savings workflow we recommend follows exactly this logic. Homeowners who follow the right sequence consistently see compounding benefits and quicker paybacks than those who jump straight to the most visible upgrades. It’s tempting to lead with solar because it’s exciting and tangible. But the homes that get the best results are the ones that do the foundational work first.
Ready to boost your home’s energy efficiency?
If you’re ready to transform your home’s efficiency, expert help can amplify your results significantly. Knowing what to do is only part of the equation. Having the right team to assess, design, and install your upgrades ensures you capture every dollar of savings available.
At Sunflowers Energy, we specialize in premium solar installations and durable roofing solutions designed to work together for maximum performance. Whether you’re exploring the solar installation process for the first time or looking to upgrade your roof with energy-efficient roofing benefits in mind, our team provides free onsite inspections and transparent guidance. Ready to see what your home can save? Review solar panel pricing and incentives and get your personalized quote today.
Frequently asked questions
What is the first step in improving home energy efficiency?
The first step is a home energy audit to find where your house loses the most energy and to prioritize upgrades. The IRS tax credit covers up to $150 of audit costs, making it an affordable starting point.
Which upgrade saves the most on energy bills?
Sealing air leaks and adding insulation typically provide the biggest savings for the lowest upfront cost, reducing bills by 20 to 30% in most homes.
Are solar panels worth it after improving efficiency?
Yes, solar panels deliver even better returns after reducing your home’s underlying energy demand. Lower demand means fewer panels needed, which reduces installation cost and shortens payback time.
Can I claim tax credits for upgrades?
Federal tax credits up to $3,200/year are available for solar, heat pumps, insulation, and other efficiency projects through 2032, provided you meet eligibility requirements.
Recommended
- Solar Energy Efficiency Guide for Maximized Home Savings – Sunflowers Energy LLC A Roofing and Solar Companys
- Energy savings optimization: complete guide saves 30% yearly – Sunflowers Energy LLC A Roofing and Solar Companys
- Improve building energy savings: roofing and solar strategies – Sunflowers Energy LLC A Roofing and Solar Companys
- 10 Proven Ways to Reduce Energy Costs with Solar & Roofing – Sunflowers Energy LLC A Roofing and Solar Companys
- Effizienzsteigerung Energiewende 2026: 23% Kostenersparnis
