Top roof repair mistakes: what homeowners must avoid
Roof problems are more common and more costly than most homeowners realize. Nearly 6 million U.S. homes suffer from active leaks, and roofs in poor condition generate 60% higher insurance losses than well-maintained ones. The frustrating truth is that most of this damage is preventable. Whether you manage a single property or a portfolio of homes, understanding the most common roof repair mistakes can save you thousands of dollars and protect your home’s structural integrity for years to come. This guide walks you through every major pitfall, so you can make smarter decisions from the start.
Table of Contents
- Why roof repair mistakes matter
- Mistake #1: Improper flashing installation
- Mistake #2: DIY missteps and mismatched materials
- Mistake #3: Skipping code compliance and poor valley liners
- Mistake #4: Patch jobs vs. proper replacement
- Mistake #5: Relying on the lowest-bid contractor
- Expert troubleshooting: Finding the real source of leaks
- Summary table: The biggest roof repair mistakes at a glance
- Take your next step: Professional roof help and solar insights
- Frequently asked questions
Key Takeaways
| Point | Details |
|---|---|
| Flashing is the top risk | Faulty flashing causes most leaks—insist on expert installation every time. |
| DIY mistakes can backfire | Home repairs using incorrect materials often void warranties and cause more damage. |
| Codes and contractors matter | Ignoring building codes or hiring on price alone can lead to hidden failures and disputes. |
| Proper diagnosis prevents waste | Finding the true leak source means fewer failed repairs and lasting solutions. |
| Prevention protects your investment | Avoiding these common errors saves on insurance, energy, and future roof costs. |
Why roof repair mistakes matter
The numbers tell a clear story. 38% of roofs across the U.S. are rated in moderate to poor condition, and the financial fallout goes well beyond a simple repair bill. Poor repairs affect your energy bills, your insurance premiums, and even your home’s resale value.
Here is what is really at stake when roof repairs go wrong:
- Higher energy costs: A compromised roof allows heat and cool air to escape, driving up utility bills. Learn more about the connection between roof repair and energy costs to see how much a damaged roof can cost you monthly.
- Voided warranties: Many roofing material warranties are invalidated by improper repairs.
- Structural damage: Water intrusion leads to rot, mold, and weakened framing over time.
- Insurance complications: Insurers may deny claims if damage results from neglect or improper work.
“A roof in poor condition does not just leak. It quietly drains your budget through energy loss, insurance penalties, and compounding structural repairs.”
Understanding roof repair basics is the first step toward protecting your investment. Now that you know how widespread and costly roof problems can be, let’s examine the top avoidable mistakes driving those costs.
Mistake #1: Improper flashing installation
Flashing is the thin metal material installed around chimneys, vents, skylights, and roof valleys to seal the joints where water could enter. It sounds simple, but faulty flashing accounts for ~90% of all penetration leaks. That makes it the single biggest leak culprit on any roof.
Visual signs of failed flashing include:
- Rust stains or visible corrosion along metal strips
- Gaps or lifted edges around chimney bases
- Water stains on interior ceilings directly below vents or valleys
- Cracked or missing caulk at flashing joints
| Factor | Professional installation | DIY installation |
|---|---|---|
| Material used | Code-grade metal flashing | Tape, caulk, or wrong gauge metal |
| Seal integrity | Mechanically fastened and sealed | Often relies on sealant alone |
| Longevity | 20 to 30 years | 1 to 5 years |
| Warranty impact | Preserved | Often voided |
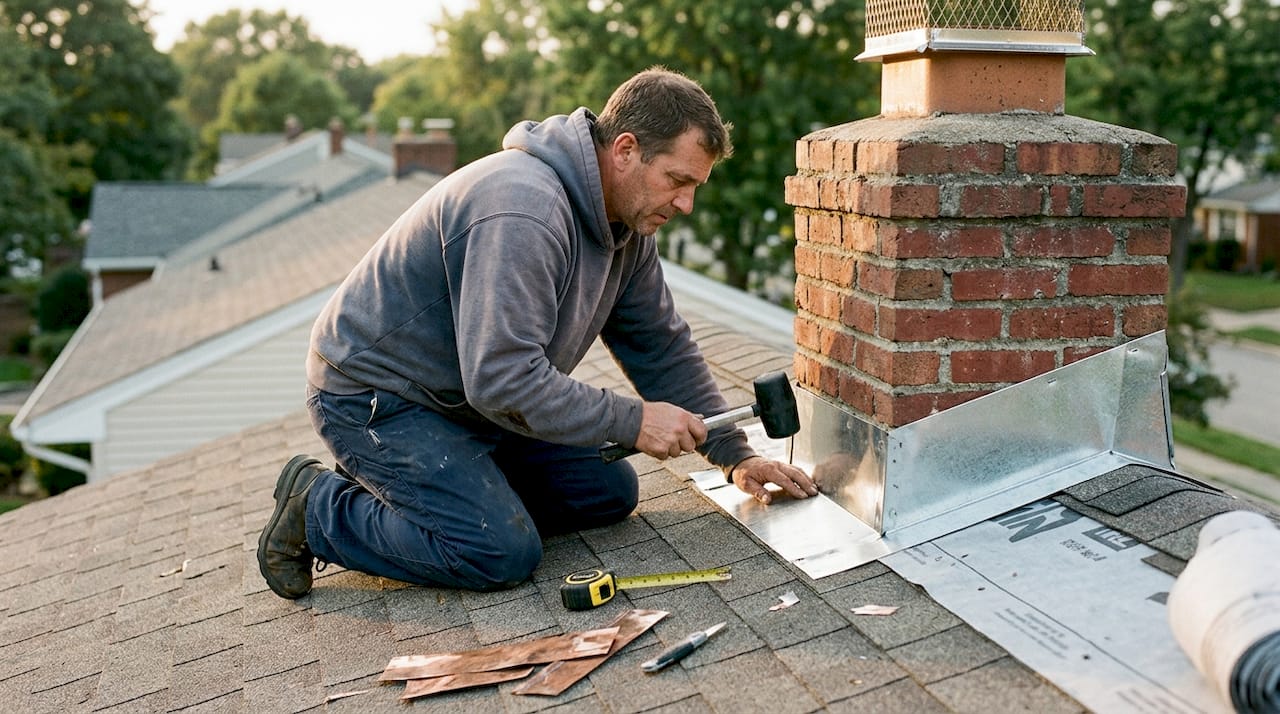
Pro Tip: If you see rust streaks running down your siding near a chimney or dormer, do not assume it is a cosmetic issue. That staining almost always signals a flashing failure that needs immediate attention.
A solid roof repair guide will always emphasize flashing as a priority. Pairing proper flashing with the right underlayment for asphalt shingles creates a layered defense that dramatically reduces leak risk.
Mistake #2: DIY missteps and mismatched materials
With the risks of faulty flashing clear, what about errors homeowners make with their own hands? DIY roof repairs are tempting, especially for small visible damage. But mismatched materials and wrong sealants used by untrained homeowners frequently void warranties and create new leaks that are worse than the original problem.
Here are the most common DIY mistakes we see:
- Using the wrong shingle type: Replacing a damaged shingle with a different brand, thickness, or color disrupts both aesthetics and water-shedding performance.
- Over-applying roofing cement: Thick globs of cement crack as temperatures change, opening new gaps.
- Nailing in the wrong zone: Shingles have a specific nailing strip. Nails placed too high or too low cause lifting and blow-offs.
- Skipping underlayment: Removing damaged shingles without checking or replacing the underlayment beneath leaves the deck exposed.
- Using interior caulk outdoors: Standard caulk breaks down quickly under UV exposure and temperature swings.
“The roof is not the place to experiment. One wrong material choice can turn a $200 repair into a $5,000 replacement.”
Pro Tip: Before purchasing any replacement shingles, photograph your existing roof and bring the image to a roofing supply store. Matching weight, texture, and granule color matters more than most homeowners expect.
Understanding your full roofing system helps you recognize which components work together, so you do not accidentally compromise one by fixing another.
Mistake #3: Skipping code compliance and poor valley liners
DIY is not the only pitfall. Overlooking structural standards is just as risky. Disregarding building codes or poor valley liner installation significantly increases failure risk, especially in areas with heavy rainfall or snow loads.
Building codes exist for a reason. They set minimum standards for material quality, fastener spacing, and water management. Ignoring them can result in failed inspections, voided insurance claims, and costly tear-outs when you sell your home.
Common code violations and valley liner mistakes to avoid:
- Installing shingles without the required number of fasteners per panel
- Using open valleys without a metal liner in high-rainfall regions
- Failing to install ice and water shield in required climate zones
- Skipping drip edge installation along eaves and rakes
- Using non-rated materials in fire-prone areas
| Valley liner type | Best use case | Risk if skipped |
|---|---|---|
| Metal (W-style) | High-water, steep slopes | Rapid shingle erosion and leaks |
| Ice and water shield | Cold climates, low slopes | Ice dam water intrusion |
| Woven shingles | Moderate climates | Debris buildup and hidden leaks |
Exploring roofing sustainability and codes gives you a clearer picture of how compliance protects both your home and your long-term energy savings.
Mistake #4: Patch jobs vs. proper replacement
Once code issues are in check, the next mistake is trying to cut corners on repair scope. Patching has its place, but applying a patch to an aging roof often creates more problems than it solves.
Patches on roofs older than 15 years risk thermal mismatch, where the new material expands and contracts at a different rate than the surrounding aged shingles. This creates gaps and cracks over time, leading to repeat leaks.
Here is how to assess whether a patch or replacement is the right call:
- Check the roof age: If it is over 15 years old, a full section replacement is almost always more cost-effective.
- Count the repair history: Two or more leaks in the same area within five years signals systemic failure, not isolated damage.
- Inspect the deck: If the plywood or OSB beneath the shingles is soft or discolored, patching the surface will not fix the underlying rot.
- Evaluate granule loss: Heavy granule loss across large areas means the shingles have reached the end of their protective life.
“A patch on a failing roof is like putting a bandage on a broken bone. It covers the problem without solving it.”
For homes that have experienced severe weather, reviewing your options for storm-damage roof repairs can help you determine the right scope of work before committing to a repair plan.
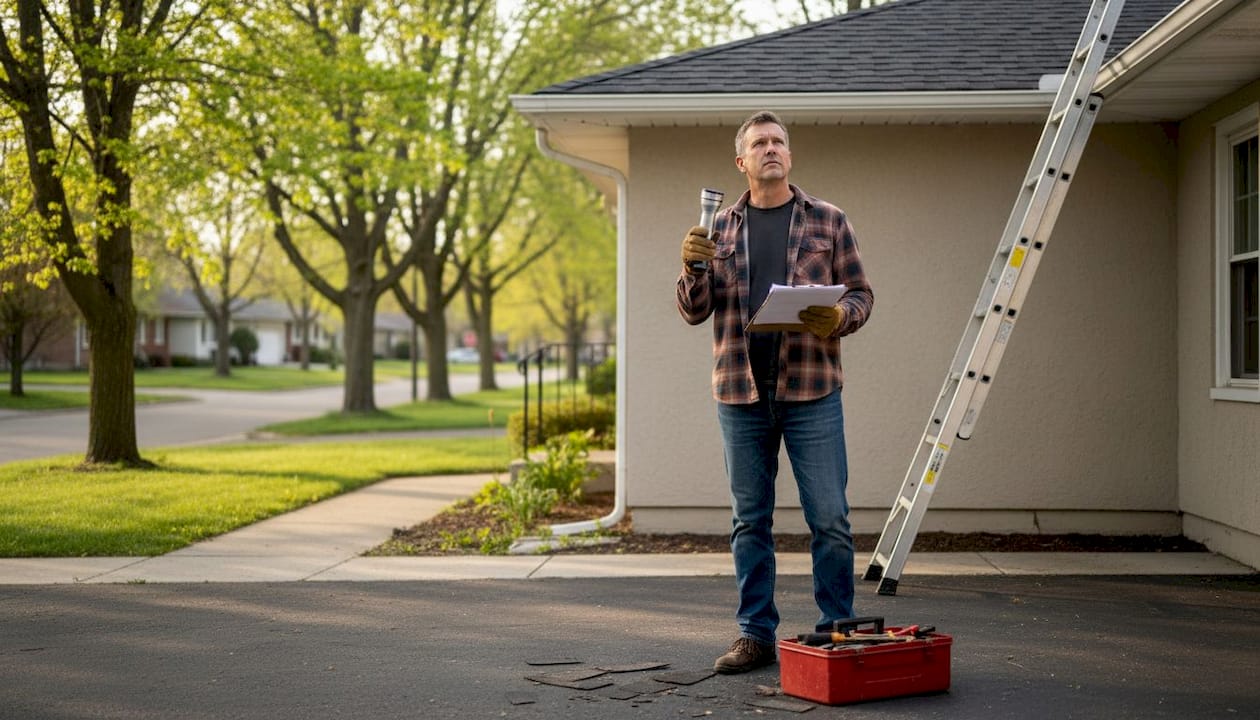
Mistake #5: Relying on the lowest-bid contractor
Now that you know how to handle the repairs themselves, let’s talk about trusting others with your roof. Choosing a contractor based solely on price is one of the most expensive mistakes a homeowner can make, particularly after a storm when opportunistic contractors flood the market.
Qualities to demand from any roofing contractor:
- Valid state license: Verify it independently through your state’s contractor licensing board.
- Proof of liability insurance and workers’ compensation: Protect yourself from liability if a worker is injured on your property.
- Local references: Ask for at least three recent jobs in your area and follow up on them.
- Written, itemized estimate: Vague quotes lead to surprise charges.
- Reasonable deposit terms: Reputable contractors rarely ask for more than 10 to 30% upfront.
Red flags to watch for include door-to-door solicitation right after a storm, pressure to sign immediately, and requests for full payment before work begins.
Pro Tip: Search your contractor’s name plus your city on the Better Business Bureau website before signing anything. A pattern of unresolved complaints is a clear warning sign.
When you are ready to find a trusted professional, exploring options for asphalt shingle roof installation near you is a smart starting point.
Expert troubleshooting: Finding the real source of leaks
Even with quality repairs and trustworthy pros, leaks can still stump you. Here is how to outsmart a tricky roof leak. The most important thing to understand is that water travels along rafters, meaning the stain on your ceiling is rarely directly below the actual leak point.
Practical steps for tracking down the true leak source:
- Start in the attic: On a dry day, use a flashlight to look for water stains, mold, or daylight coming through the deck.
- Run a hose test: Have someone spray water on specific roof sections while you watch from inside the attic. Work from low to high, section by section.
- Check penetrations first: Pipes, vents, and chimneys are responsible for the majority of leaks. Inspect their flashings before assuming shingle damage.
- Look for nail pops: Exposed nail heads in the attic can drip water that travels several feet before appearing as a stain.
- Document everything: Photograph stains and suspected entry points before and after repairs to track whether the fix held.
After a hail event, a thorough DIY roof inspection after hail can help you identify damage before it becomes a full leak.
Summary table: The biggest roof repair mistakes at a glance
Let’s wrap up with a clear comparison of all the top mistakes and how to avoid them.
| Mistake | Key consequence | How to avoid it |
|---|---|---|
| Improper flashing installation | 90% of penetration leaks | Hire a licensed pro; use code-grade metal flashing |
| DIY material mismatches | Voided warranties, new leaks | Match materials exactly; consult a supplier |
| Skipping code compliance | Failed inspections, denied claims | Pull permits; follow local building codes |
| Over-patching old roofs | Thermal mismatch, repeat leaks | Replace full sections on roofs over 15 years old |
| Lowest-bid contractor | Poor work, scams, extra costs | Verify license, insurance, and references |
| Misreading leak location | Repairs in the wrong spot | Use hose test and attic inspection for diagnosis |
Take your next step: Professional roof help and solar insights
Every mistake covered in this guide is avoidable with the right knowledge and the right team. Your roof is your home’s first line of defense, and protecting it means more than just fixing what is visibly broken.
At Sunflowers Energy, we offer professional roofing services designed to catch problems before they become costly failures. Start with a complimentary roof inspection to get an expert assessment of your roof’s current condition, with no pressure and no obligation. If your home has experienced recent weather damage, our team specializes in safe storm-damage repairs and can help you navigate the insurance process. We also help homeowners pair durable roofing with solar solutions to maximize energy savings from the top down. Reach out today and let us help you protect what matters most.
Frequently asked questions
What is the most common cause of recurring roof leaks?
Improper flashing installation around chimneys and roof valleys is the top cause, responsible for about 90% of leak penetrations. Correcting flashing issues is the single most effective step toward a leak-free roof.
Does DIY roof repair void most roofing warranties?
Yes, most warranties are voided by DIY repairs, especially when mismatched materials or improper sealants are used. Always check your warranty terms before attempting any repair yourself.
How can I tell if my roof needs a patch or full replacement?
If your roof is over 15 years old or has repeated leaks, a full section replacement is safer and more cost-effective than patching. Soft decking beneath the shingles is another clear sign that patching will not hold.
What should I check before hiring a roofing contractor?
Always verify licenses, insurance, and references, and avoid contractors who want large upfront deposits or offer unusually low bids. A written, itemized estimate is non-negotiable.
Why don’t water stains always match the leak source?
Water travels along rafters, meaning the stain may appear far from the actual entry point. A hose test combined with an attic inspection is the most reliable way to find the true source.
Recommended
- What is roof repair? A 2026 guide for homeowners – Sunflowers Energy LLC A Roofing and Solar Companys
- Roof maintenance best practices: pro tips for longevity – Sunflowers Energy LLC A Roofing and Solar Companys
- How to repair storm-damaged roof safely in 2026 – Sunflowers Energy LLC A Roofing and Solar Companys
- Master the residential roof repair process in 2026 – Sunflowers Energy LLC A Roofing and Solar Companys
