Getting your gutter measurements wrong means wasted money, poorly fitting materials, and water damage that could have been avoided. Whether you’re planning a DIY installation or just want to understand what a contractor is quoting you, knowing how to measure for gutters starts with understanding three things: linear footage, gutter size, and downspout placement.
As a roofing company, we see the consequences of improperly sized or poorly planned gutter systems all the time. At Sunflowers Energy LLC, our roof inspections frequently reveal gutter issues that lead to fascia rot, foundation erosion, and interior leaks, problems that almost always trace back to incorrect measurements or undersized gutters.
This guide walks you through the full measurement process step by step. You’ll learn how to calculate the linear feet of gutter you need, choose the right gutter width based on your roof’s drainage area, and determine how many downspouts to install and where to place them. By the end, you’ll have the numbers you need to buy materials confidently or evaluate any estimate that lands in your inbox.
What you need before you measure
Before you take a single measurement, gather the right tools and understand the basics of safe ladder use. Skipping this prep step leads to errors, repeated trips up the ladder, and measurements that don’t add up when you’re at the hardware store. Knowing how to measure for gutters correctly starts on the ground, not at the roofline.
Tools you’ll need
You don’t need specialized equipment to get accurate gutter measurements. A standard 25-foot tape measure handles most residential rooflines without issue, and a notepad with a pencil lets you sketch your layout and log each measurement before you forget it. If your roofline runs longer than your tape measure, a chalk line or a laser distance measurer makes it much easier to work in sections.
Here’s what to have ready before you start:
| Tool | Purpose |
|---|---|
| 25-foot tape measure (100-ft for large commercial) | Measure linear footage along fascia |
| Notepad and pencil | Sketch roofline and record dimensions |
| Calculator or phone | Add up total linear feet and drainage area |
| Ladder (rated for your weight) | Reach the fascia and gutter line safely |
| Level or slope app | Check gutter pitch in Step 4 |
| Helper | Hold the tape and stabilize the ladder |
A helper is not optional on complex rooflines. Two sets of hands prevent both measurement errors and ladder accidents.
Safety basics before you climb
Ladder safety is non-negotiable before you begin any measurement near a roofline. Set your ladder on firm, level ground and make sure it extends at least three feet above the gutter edge or fascia board you’re working near. Use the four-to-one rule: for every four feet of height, the base of the ladder should sit one foot away from the wall.
Before climbing, inspect the gutters visually from the ground. Loose sections or corroded brackets can shift when you lean a ladder against them. If anything looks unstable, measure from the ground with a laser measurer or call a professional to assess the condition first.
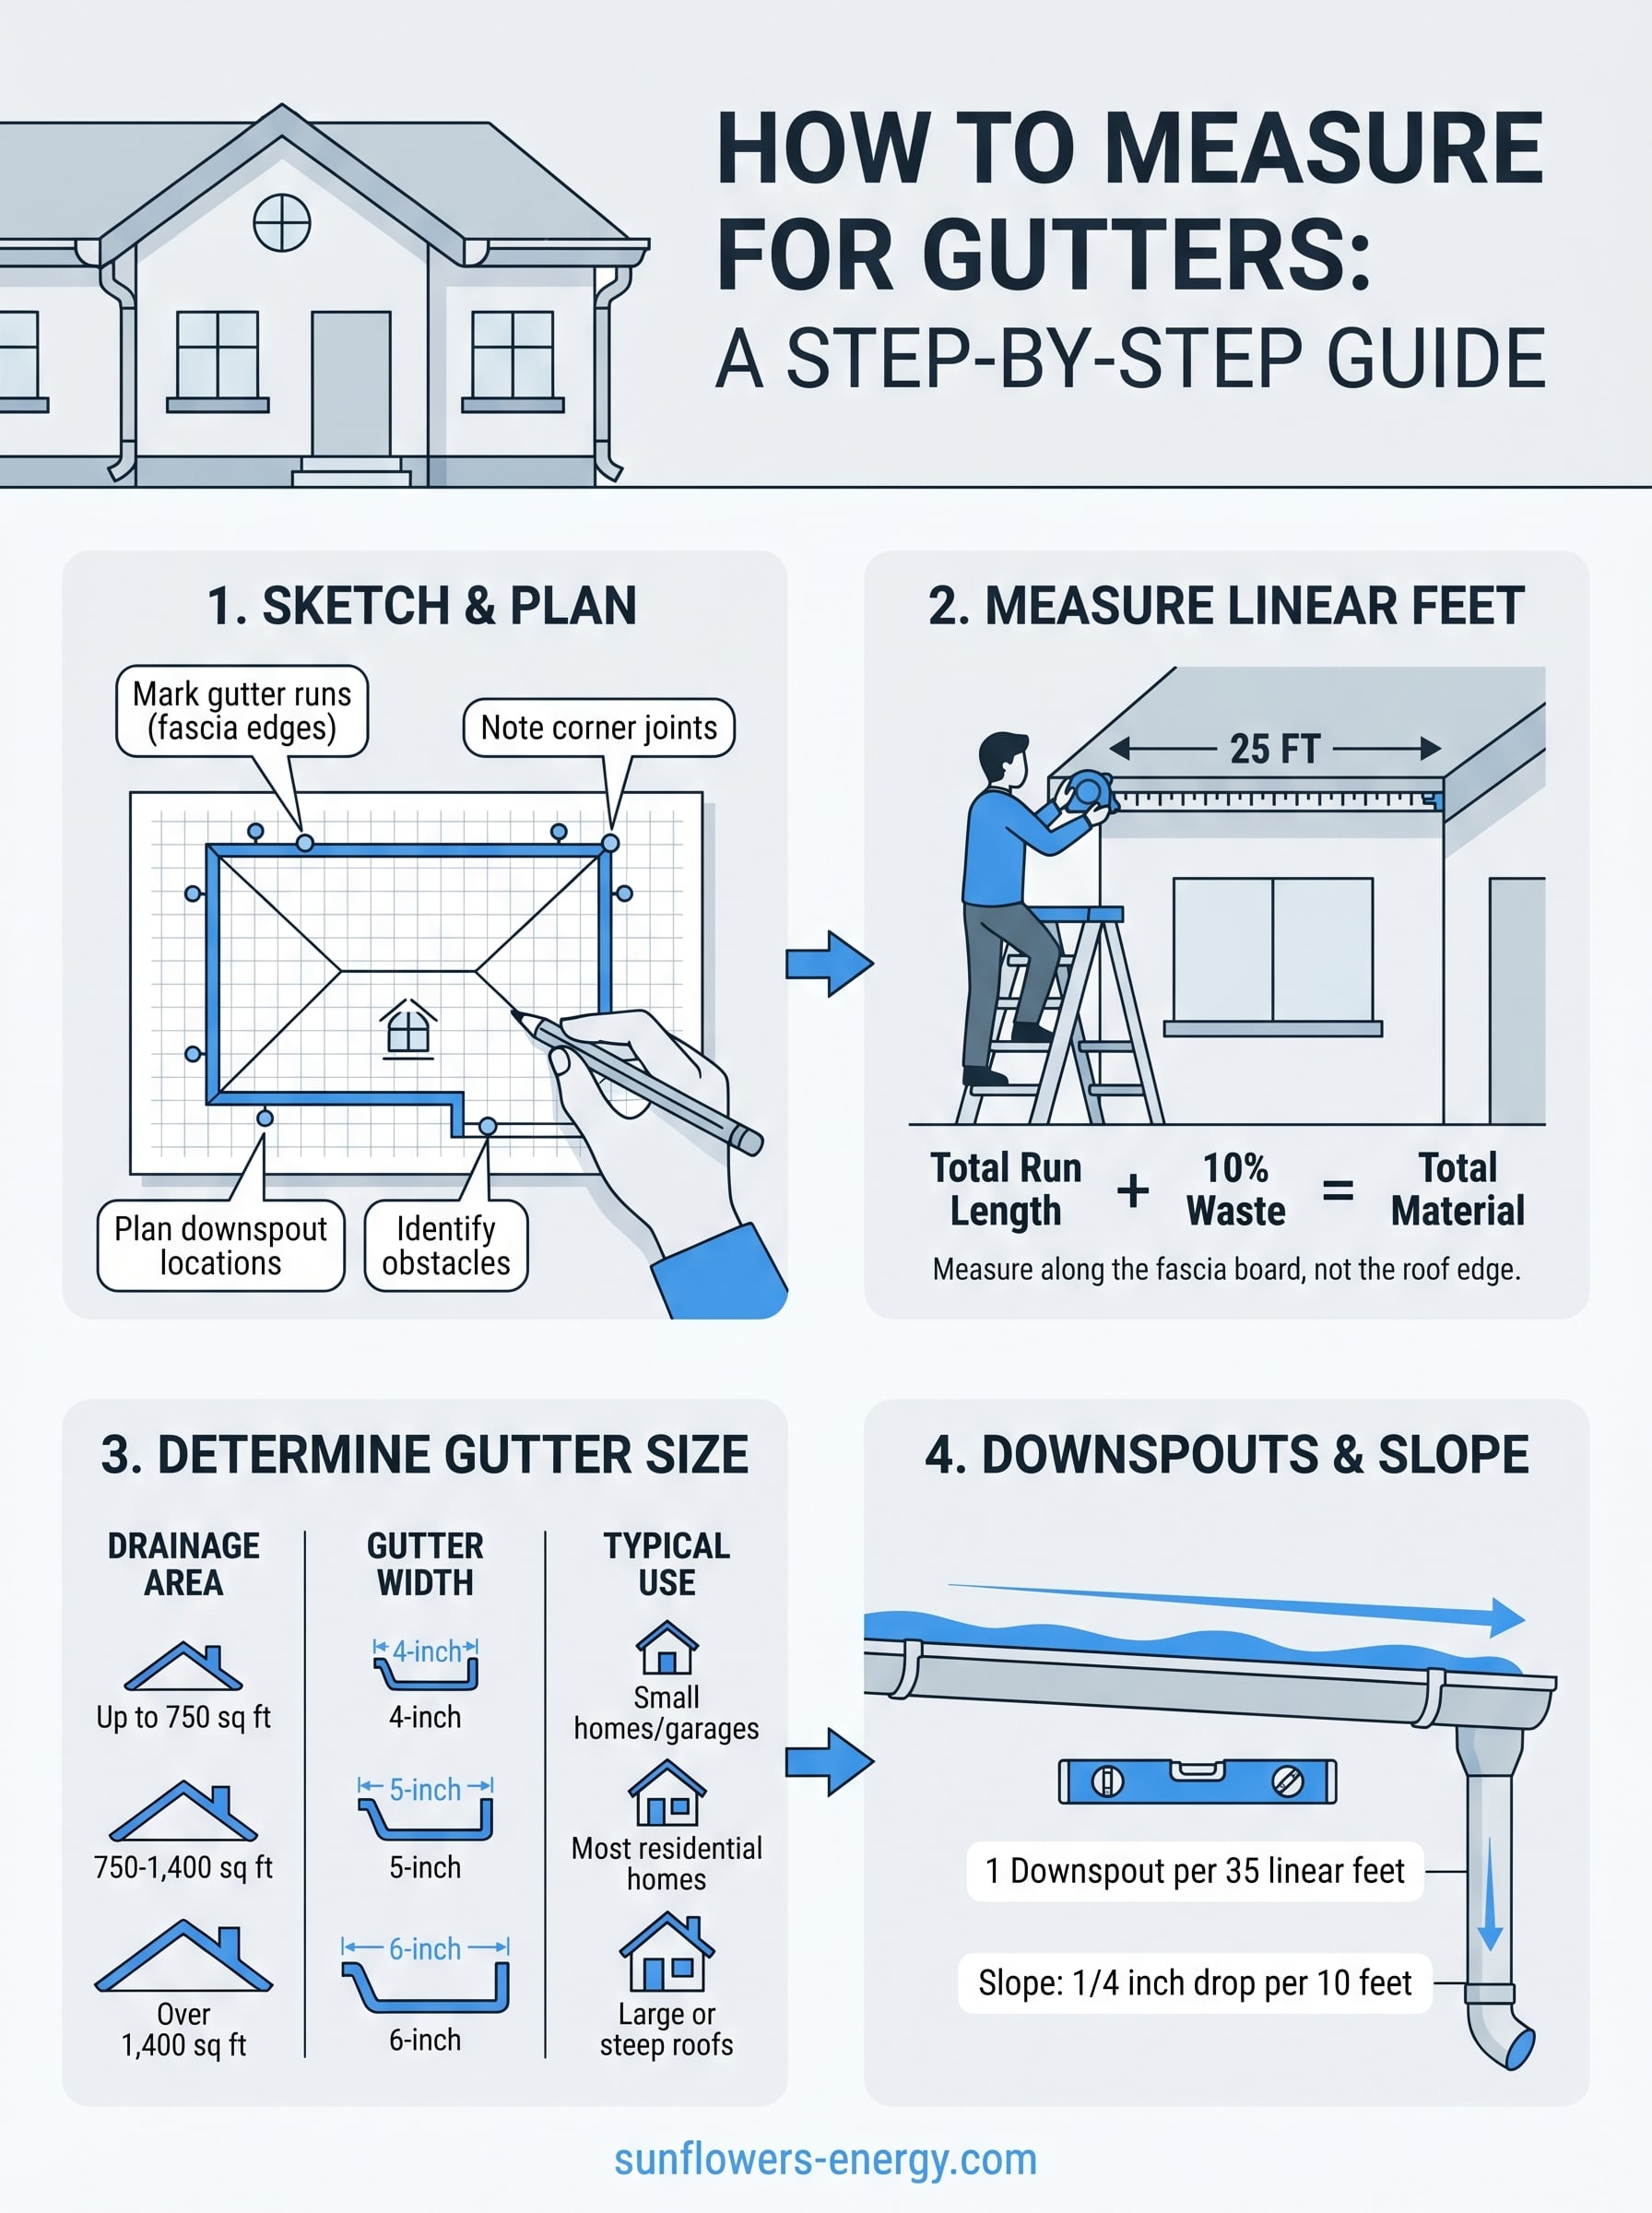
Step 1. Sketch your roofline and gutter plan
A quick hand-drawn sketch saves you time and prevents costly errors when you start the actual measuring. Before you pick up your tape measure, draw your home’s footprint from above and mark every roof edge that needs a gutter run. You don’t need precise dimensions yet; you just need a visual map that shows where gutters will go and where water needs to drain.

Why a sketch matters
Jumping straight to measuring without a plan often means you miss a section of roofline or miscalculate corner overlaps, which throws off your total linear footage. A sketch also helps you think through downspout locations before you buy materials, which is one of the most important parts of knowing how to measure for gutters accurately.
Plan your downspout locations on paper first. Every gutter run needs at least one downspout to drain effectively.
What to mark on your sketch
Your sketch should capture every detail that affects your materials list and final layout. Mark each roof section and its approximate length, every inside and outside corner, and each proposed downspout location. Note any obstacles like windows, utility boxes, or landscaping beds that affect where a downspout can realistically discharge water.
Use this checklist to make sure your sketch is complete before you climb the ladder:
- All fascia edges that will carry gutters
- Corner joints (inside and outside)
- Proposed downspout drop points
- Obstructions along the wall below the roofline
Step 2. Measure total gutter length in linear feet
With your sketch ready, you can now take the measurements that determine how much gutter material to buy. Linear footage is simply the total length of all gutter runs added together. Knowing how to measure for gutters accurately here saves you from making multiple hardware store trips or ending up with leftover material you can’t return.
Measure each run individually
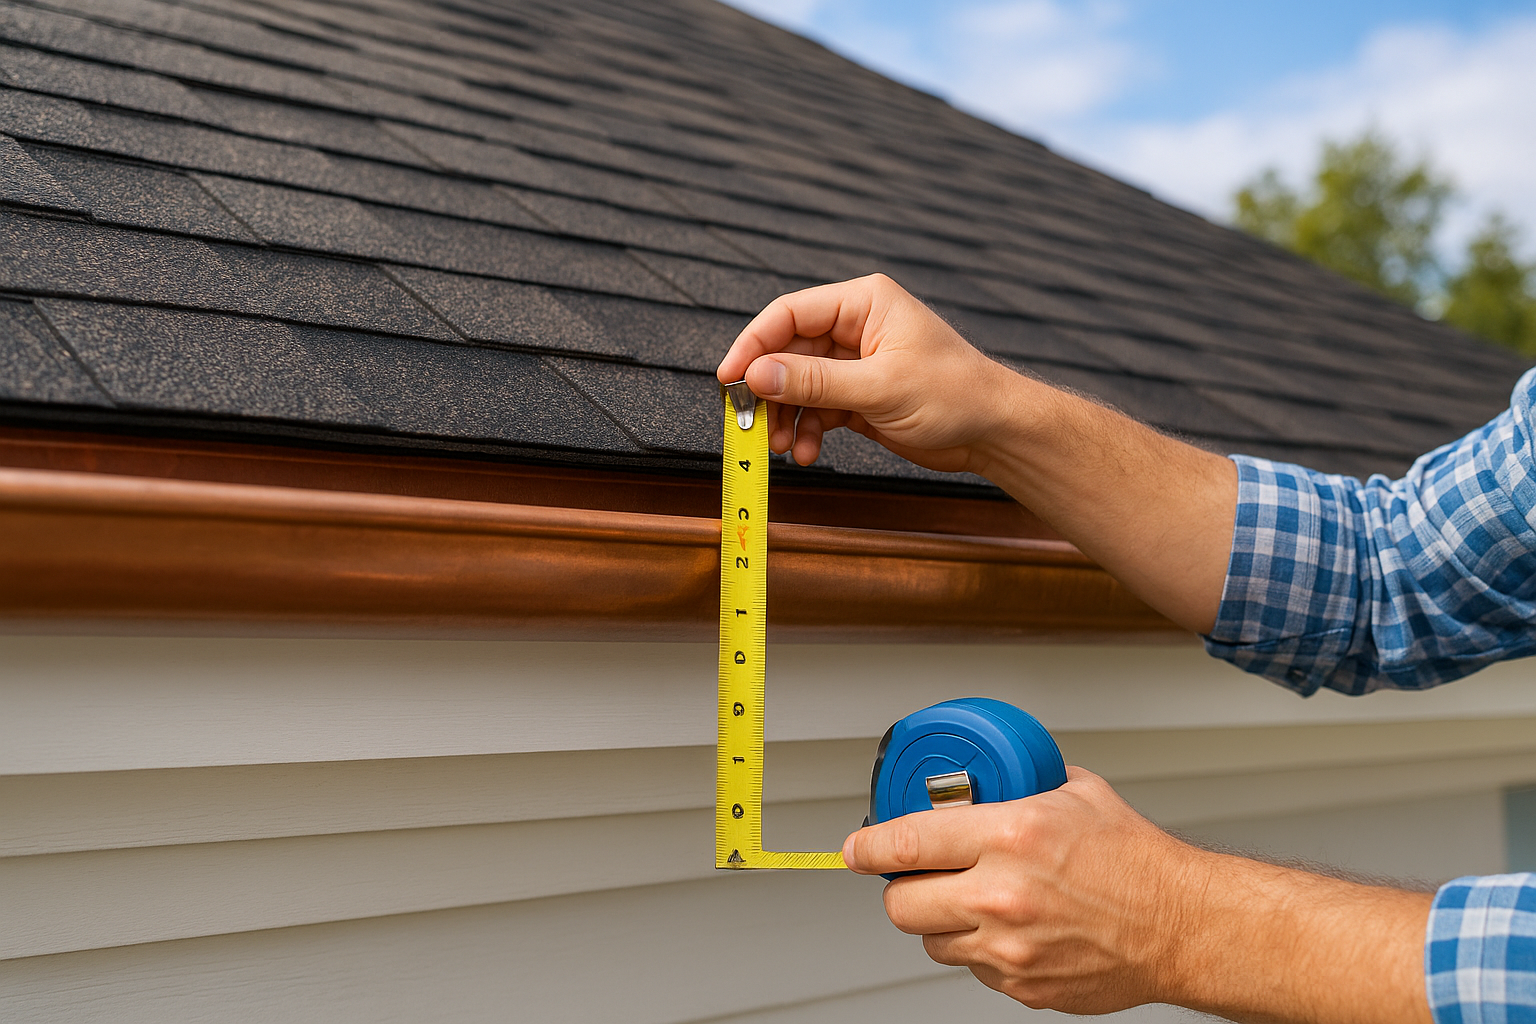
Start at one end of a fascia section and pull your tape measure to the other end, following the fascia board as closely as possible. Write each measurement directly on your sketch next to the corresponding wall. If a section runs longer than your tape measure, mark a midpoint with chalk, measure each half, and add them together.
Measure along the fascia board itself, not the edge of the roofing material. The fascia is where the gutter actually mounts.
Work around your entire home, measuring every run you marked on your sketch. Use this simple log to record each section:
| Section | Measured Length |
|---|---|
| Front left | 24 ft |
| Front right | 18 ft |
| Back left | 24 ft |
| Back right | 18 ft |
| Total | 84 ft |
Add it up and account for waste
Add all individual run lengths to get your raw total. Then add 10 percent to that number to cover end caps, inside corners, and cutting waste. For the example above, 84 feet becomes 92 feet of material to order.
Step 3. Measure gutter size and match the style
Once you know your total linear footage, gutter width becomes the next critical measurement. The right size depends on your roof’s drainage area, not personal preference. Using undersized gutters on a steep or wide roof is one of the most common mistakes in knowing how to measure for gutters correctly.
Calculate your drainage area
Drainage area is the square footage of roof surface that funnels water into each gutter run. Multiply the length of the roof section by its horizontal width (not the slope distance) to get the drainage area in square feet. Use this table to match your drainage area to the right gutter size:
| Drainage Area | Recommended Gutter Width |
|---|---|
| Up to 750 sq ft | 4-inch gutter |
| 750 to 1,400 sq ft | 5-inch gutter |
| Over 1,400 sq ft | 6-inch gutter |
Most residential homes use 5-inch gutters, but steep roofs or large drainage areas often require 6-inch gutters to handle peak flow.
Match the gutter profile to your fascia
K-style gutters are the most common residential option and mount flat against the fascia board without additional hardware. Half-round gutters work well on older or historic homes but require special hangers that space them away from the fascia. Measure your fascia width before ordering to confirm the profile you choose seats flush against the board without gaps or overhangs.
Step 4. Size downspouts and set the right slope
Downspout sizing and gutter pitch are the two details most people skip when figuring out how to measure for gutters, and both directly affect how well your system performs during a heavy rain. Get either one wrong and water backs up, overflows, or pools against your foundation.
Determine how many downspouts you need
One downspout handles up to 35 linear feet of gutter under normal conditions. If your gutter run is longer than that, you need a second downspout. For a 70-foot run, plan for two downspouts spaced roughly evenly along the fascia. Use a 4-inch round or 3×4-inch rectangular downspout for standard 5-inch gutters, and step up to a 3×4-inch rectangular downspout when you’re running 6-inch gutters or draining a large roof area.
Never place a downspout at a high point in the gutter run. Water flows to the lowest point, so downspouts always go at the ends or low spots of each run.
Set the correct slope
Your gutter needs a slight downward pitch toward each downspout so water moves instead of sitting still. The standard slope is one-quarter inch of drop for every 10 feet of gutter run. For a 40-foot run, that means your gutter drops one full inch from the high end to the downspout end. Mark your high-end bracket location first, then use a level or a slope calculator app to set each subsequent hanger at the correct drop before you finalize any bracket positions.
Next steps
Now you have everything you need to know about how to measure for gutters: linear footage, gutter width, downspout count, and slope. Write your final numbers down before you head to the hardware store, and keep your sketch on hand so any supplier can verify your material list on the spot.
If your roofline shows signs of damage, sagging fascia, or rotted wood while you’re measuring, address those repairs before installing anything new. New gutters mounted to a failing fascia will fail fast, no matter how accurate your measurements are. Skipping that check is the most expensive mistake homeowners make after getting the numbers right.
At Sunflowers Energy LLC, we handle full roof inspections that cover your fascia, soffit, and drainage system in one visit. Ready to get an expert set of eyes on your roofline before you buy a single bracket? Schedule a free roof inspection with Sunflowers Energy and we’ll give you a clear, no-obligation assessment.
